We were taught to do this with a 6"Steel rule and sight it so that it is parallel to the table topI will offer a technique rather than a tool.
Quick way to find center of a round part such as a tube to prevent the drill bit walking. If you have a drill press or mill.
Clamp the tube in the drill press vise. Get as close as possible to center by sight. Then take a thin piece of stock ( I use a loose feeler gauge .030)
under the drill and see if it lays flat or tips one way or the other. Move your vise accordingly. It is possible to be very accurate using this method. The final check is to remove the feeler gauge and see if the drill deflects in any direction. Practice on a scrap piece of tube to get the feel for it.
Thanks for visiting Access Norton
- Guest view limit reached
- Create a free account (more details)
- Already a member? Click here to login
You are using an out of date browser. It may not display this or other websites correctly.
You should upgrade or use an alternative browser.
You should upgrade or use an alternative browser.
Tools You Have Made to Maintain your Norton
- Thread starter texasSlick
- Start date
motorson
VIP MEMBER
- Joined
- Nov 29, 2011
- Messages
- 521
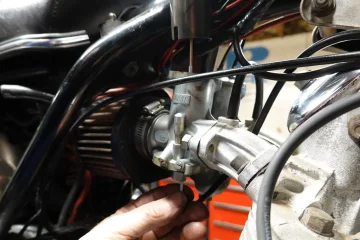
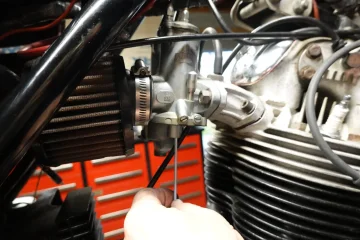
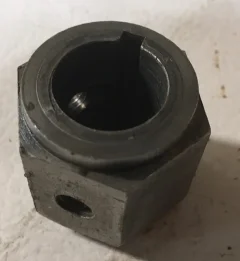
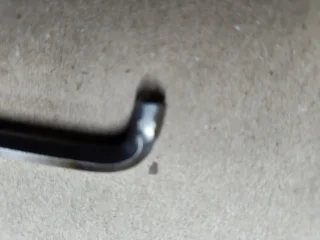
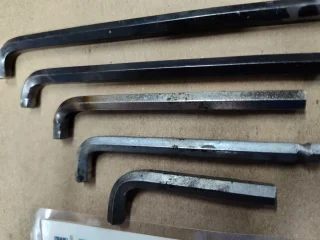
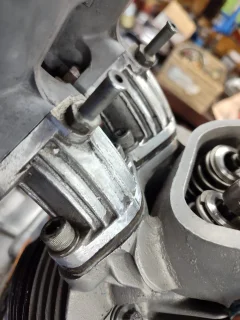
Tools for installing Amal manifolds:
Yesterday I tried to install some Amals onto the manifolds which I had already bolted to the head. Then I remembered the
impossibility of tightening the inside nuts. I also remembered that this problem had already been solved with my trusty set
of cut off Allen wrenches. Note the hand ground swivel ball on two of them as well as the 1/12th clocking of one of the
shorty Allens.
:


seattle##gs
VIP MEMBER
- Joined
- Oct 28, 2014
- Messages
- 2,156
When installing the head the pushrods USUALLY drop into the pushrod tunnel and locate themselves in the lifters, perhaps 90 % of the time. The other 10% will result in a bent valve and perhaps a broken valve guide. My method is to put a dab of grease on the ball end of the push rod then put the head on. I have two small blocks of wood 1" tall which allows the 3 studs to barely engage with their holes. The blocks go to the rear of the head and support it while I double check if the pushrods have seated in the lifters. The grease makes them stick in the lifter cups and I can feel them trying to draw the lifters up as I move them. Once you are sure the pushrods are seated then remove the blocks and continue on.
Because it is difficult to get my hand in under the head and around the stud I use a screwdriver instead of my right hand and with my left hand on the outside I can move the pushrod up and down. If I feel resistance then I know the pushrod is correct.
Bending a valve is even more aggravating than having a stud pull out.
ashman
VIP MEMBER
- Joined
- Jul 11, 2010
- Messages
- 6,460
Every time I have put a head on the push rods always drop into position on the lifters but I always find one pushrod will always be misaligned on one rocker arm and need to be put in place with a small screw driver before pulling down the head on the bolts, very important to make sure all 4 push rods are sitting in position on the rocker arms before pulling the head down, I go by the book and hold the pushrods in between my fingers while putting the head in place, but most times with heads I have the motor on the bench on a engine stand.
I always find it's the right inlet rocker/pushrod that needs the screw driver trick to put in position, but it's been so long since I had my head off (15 years ago me thinks).
Ashley
I always find it's the right inlet rocker/pushrod that needs the screw driver trick to put in position, but it's been so long since I had my head off (15 years ago me thinks).
Ashley
seattle##gs
VIP MEMBER
- Joined
- Oct 28, 2014
- Messages
- 2,156
Don't count on it. I bent a valve 2 years ago and one a month ago because one didn't seat and many close calls in the past...and I.m looking for it. I turn the radio off and very slowly turn it over feeling for any extra resistance. Hard to tell between spring pressure and valves touching. It takes very little to bend a valve.
ashman
VIP MEMBER
- Joined
- Jul 11, 2010
- Messages
- 6,460
Well been working on my Norton and friends Norton's for 48 years and have replaced a few head gaskets and engine rebuilds over them years and never had any problems with the pushrods dropping on the lifters, but of course I do make sure everything is right before a pull down the head and turn the motor over slowly to make sure pushrods are seating right.Don't count on it. I bent a valve 2 years ago and one a month ago because one didn't seat and many close calls in the past...and I.m looking for it. I turn the radio off and very slowly turn it over feeling for any extra resistance. Hard to tell between spring pressure and valves touching. It takes very little to bend a valve.
motorson
VIP MEMBER
- Joined
- Nov 29, 2011
- Messages
- 521
Jim Comstock told me that he removes the right intake rocker arm until after seating the head and installs it after the head is on.Well been working on my Norton and friends Norton's for 48 years and have replaced a few head gaskets and engine rebuilds over them years and never had any problems with the pushrods dropping on the lifters, but of course I do make sure everything is right before a pull down the head and turn the motor over slowly to make sure pushrods are seating right.
seattle##gs
VIP MEMBER
- Joined
- Oct 28, 2014
- Messages
- 2,156
and that's how I make sure they are seated correctly in the liftersI have never removed my rockers, still all original, and have never had any problem installing pushrods while they were in place, just got to make sure they are all seating right before pulling the head down.
I have found that the Chapman mini ratchet with the ball end driver bits works great although I still carry my cut down Allen wrenches in my tool bag, https://chapmanmfg.com/products/famous-midget-ratchet-cm-13Tools for installing Amal manifolds:
Yesterday I tried to install some Amals onto the manifolds which I had already bolted to the head. Then I remembered the
impossibility of tightening the inside nuts. I also remembered that this problem had already been solved with my trusty set
of cut off Allen wrenches. Note the hand ground swivel ball on two of them as well as the 1/12th clocking of one of the
shorty Allens.
:View attachment 113949View attachment 113950View attachment 113951View attachment 113952
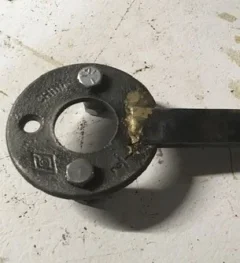
When I was assembling the CNW estart I needed a way to hold the clutch while tightening the nut. I found that a 3/4" pipe flange had just the right bolt circle, so I machined the flange flat, added some spacers to the back of the flange, opened the hole diameter and brazed on a handle.
Attachments
My wife always complains when I ask her to turn the throttle while I strobe my bike, so I built a hand throttle that bolts to my bike lift and lets me control the RPM from the primary side while strobing it. I made a cardboard reference disk, put it on the twist grip, started the bike and calibrated the engine speed. Then I bolt the manual throttle to my lift, attach a piece of paracord to the twist grip, run it through the pulley and tie it off on the handle of my manual throttle & pull the handle until the engine gets to the right RPM. Long winters?

Last edited:
- Joined
- Aug 12, 2011
- Messages
- 1,409
Your wife is not the only one that complains!That brought a smile.My wife always complains when I ask her to turn the throttle while I strobe my bike, so I built a hand throttle that bolts to my bike lift and lets me control the RPM from the primary side while strobing it. I made a cardboard reference disk, put it on the twist grip, started the bike and calibrated the engine speed. Then I bolt the manual throttle to my lift, attach a piece of paracord to the twist grip, run it through the pulley and tie it off on the handle of my manual throttle & pull the handle until the engine gets to the right RPM. Long winters?View attachment 114018
Mike
motorson
VIP MEMBER
- Joined
- Nov 29, 2011
- Messages
- 521
Yes, I looked it up. You are still talking about tightening the Allen cap screws after the manifolds are already tightened onto the carbys.I have found that the Chapman mini ratchet with the ball end driver bits works great although I still carry my cut down Allen wrenches in my tool bag, https://chapmanmfg.com/products/famous-midget-ratchet-cm-13
cliffa
VIP MEMBER
- Joined
- May 26, 2013
- Messages
- 4,422
Admittedly I didn't make this, but I purchased a micro ratchet set, and it has been invaluable for all my bikes in tight situations such as the Commando manifolds. If it’s a really tight space, you can remove the hex to 1/4” adapter from the end and then put a loose hex key through the hole and push / pull on it.Tools for installing Amal manifolds:
Yesterday I tried to install some Amals onto the manifolds which I had already bolted to the head. Then I remembered the
impossibility of tightening the inside nuts. I also remembered that this problem had already been solved with my trusty set
of cut off Allen wrenches. Note the hand ground swivel ball on two of them as well as the 1/12th clocking of one of the
shorty Allens.
:View attachment 113949View attachment 113950View attachment 113951View attachment 113952
Last edited:
robs ss
VIP MEMBER
- Joined
- Aug 16, 2016
- Messages
- 4,247
Okay - here's a tool I haven't made, but will if I have to repair another Mk3 anti-backfire device.
The difficulty is how to apply 50ft.lb to the shaft whilst clamping the gear.
So far I have used a pair of modified (1/2" tool steel welded each side) automatic visa-grips with a piece of 1mm ally sheet to protect the spline. I works (just) but is a PITA.
Next time I would buy the splined thrust washer (see below) and weld it to a 1/2" drive 1" socket. Gives direct, solid connection for the torque wrench.
Cheers

Andover Norton - THRUST WASHER for Commando 850Mk3 - 06.5652
THRUST WASHER for Commando 850Mk3
andover-norton.co.uk
Similar threads
- Replies
- 23
- Views
- 5,236
- Replies
- 57
- Views
- 6,985


