Tools You Have Made to Maintain your Norton

Here's one from the cheap end of town...
Found an old orphan socket (5/8" Stahlwille) that fitted nicely into the points seal cavity (23.0mm vs 23.7mm hole)
Sanded the drive end with a bench sander and hand sanded the sharp edge (5 minutes work)
Worked beautifully 👍
39230514-BC6F-4ABA-9018-683E63BB636C.JPG
The crankshaft seal won't need to be as "square" due to the orientation of the seal - pressing on the steel side.

...just got to remember which one for next time!🤔🙄
 
Last edited:
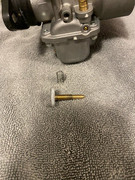
It simply holds the slide spring while you hook up the cable to the slide. I always send the spring across the room when trying to hold it with my thumb while trying to hook the cable end. The slots allow you to slide it off after the cable is attached to slide. No Latin here just Queen's English!

Tools You Have Made to Maintain your NortonTools You Have Made to Maintain your NortonTools You Have Made to Maintain your Norton
 
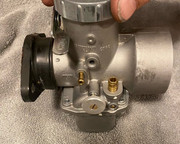
Here are 2 tools I made for specific jobs. And a mikuni slide adjuster screw which makes it a lot easier to turn the idle up and down and easily locate the screw. I looked for years for this and finally made them myself.

Tools You Have Made to Maintain your Norton
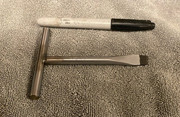
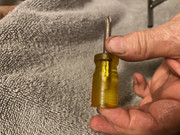
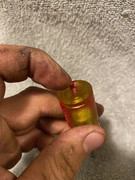
The T-handle was made for the lucas headlight screw, it's much easier to control than the usual foot-long screwdriver. It's also good for the Oddie fittings on the Atlas side cover and turning rocker spindles among other things.. The cut down phillips is for the carb float bowl screws, either Mikuni or Amal. I turn down the O.D. in the lathe and dimple the end. The dimple allows for much better control and makes a frustrating job quite a bit easier. I can make more of them for a very reasonable price.
Idle adjust screw...$20
Cut down 3/8 flat screwdriver....$12
Phillips stubby screwdriver....$10
I made these tools a few years ago and use them quite often. The T-handle flat screwdriver has found a new use......I use it to spread the kickstart lever to get it off the shaft.....works better than a long plastic handle screwdriver.

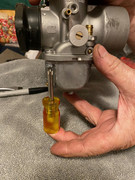
The cut down Philips screwdriver has one job only...to make the float bowl R&R much easier. I thinned it on the lathe to make it easier to use in tight spaces. I put a big dimple in the end so one hand can hold the float bowl and screw driver while the other hand does the turning....see photo. I fiddle with carburetors all the time and this is the first tool I grab. The only thing to improve it would be a magnetic tip.

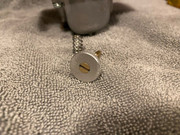
The idle adjuster screw for Mikunis actually takes several steps to make. I make full use of the idle screw for starting and idle, that's one of the big advantages of the single carb. As it warms up and the idle increases I can easily reach down and lower it while riding. I've sold maybe 15 of them.

As you are well aware of, these bikes can can be very aggravating and anytime I can reduce the frustration with a special tool I'll do it. (for example...after two nights trying to install a kickstart spring on an A65 I made a tool that popped it on in a couple of minutes). If the job is a real bear I'll put it off to the last minute. If a special tool makes it easy then the job gets done.
If the tool stands the test of time I'll offer it to Norton people. The price is about $5 above the cost of materials.
 
It simply holds the slide spring while you hook up the cable to the slide. I always send the spring across the room when trying to hold it with my thumb while trying to hook the cable end. The slots allow you to slide it off after the cable is attached to slide. No Latin here just Queen's English!

View attachment 109212View attachment 109213View attachment 109214
My method on these is to just wind the spring around the cable, like a big screw thread, from completely off the cable save for just the very end of spring, to fully on cable. Takes no compressing force and saves me quite a struggle.
 
I made these tools a few years ago and use them quite often. The T-handle flat screwdriver has found a new use......I use it to spread the kickstart lever to get it off the shaft.....works better than a long plastic handle screwdriver.

The cut down Philips screwdriver has one job only...to make the float bowl R&R much easier. I thinned it on the lathe to make it easier to use in tight spaces. I put a big dimple in the end so one hand can hold the float bowl and screw driver while the other hand does the turning....see photo. I fiddle with carburetors all the time and this is the first tool I grab. The only thing to improve it would be a magnetic tip.

The idle adjuster screw for Mikunis actually takes several steps to make. I make full use of the idle screw for starting and idle, that's one of the big advantages of the single carb. As it warms up and the idle increases I can easily reach down and lower it while riding. I've sold maybe 15 of them.

As you are well aware of, these bikes can can be very aggravating and anytime I can reduce the frustration with a special tool I'll do it. (for example...after two nights trying to install a kickstart spring on an A65 I made a tool that popped it on in a couple of minutes). If the job is a real bear I'll put it off to the last minute. If a special tool makes it easy then the job gets done.
If the tool stands the test of time I'll offer it to Norton people. The price is about $5 above the cost of materials.
You can use the kickstart bolt to spread the kickstart
Remove the bolt and fit it from the other end of the hole
Put a washer in the slot and tighten the bolt against the washer until the kickstart spreads and remove it from the spline
 
You can use the kickstart bolt to spread the kickstart
Remove the bolt and fit it from the other end of the hole
Put a washer in the slot and tighten the bolt against the washer until the kickstart spreads and remove it from the spline
I like that method. I'll give it a try. That sounds easier
 
I mentioned earlier that seattle##gs made the set in the picture. The two large tools are for the front and rear isos. The four smaller ones are for the engine mounting bolts. I've always used long Phillips screwdrivers to align and hold things will installing the power unit or engine, but since these are the right diameter and have a smooth pointy tip, they work much better.


View attachment 108076

I installed an engine yesterday using these tools and a new method (at least for me). The engine was done except the head and primary. I installed the front ISO on the engine. They are too heavy for me these days so I use my engine hoist to help. Rigging the engine for lifting took about 15 minutes, installing it with these tools took about 3 minutes and followed by about 5 minutes putting the bolts in and torquing them.

The picture below is just as I started lifting. The aluminum plate on top is a very handy "tool". It's just a 1/4" aluminum plate with holes drilled for various jobs. In this case, the two 5/16" front center studs and two head bolts.

To install, I moved the hoist and engine into place, lowered it enough to put a tool through the top rear mounting location, lowered the engine more and put the front ISO tool through the front ISO, and then put a tool through the middle rear mounting location. With those three in place, I could slip in the bottom rear 5/16" bolt and then push the tools out with the actual mounting bolts.

If you build engines or bikes you need this set! I may even switch to this method for complete bike builds. In the past I've always built the engine with the head on, put it on its side and lowered the frame over it, but I hate fighting to get the front ISO into place. This is SO MUCH easier. I find getting a head off by myself in the frame a PITA but putting them on is big deal.

Tools You Have Made to Maintain your Norton
 
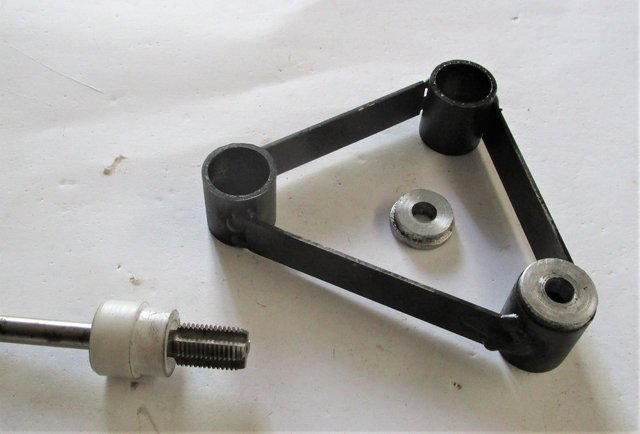
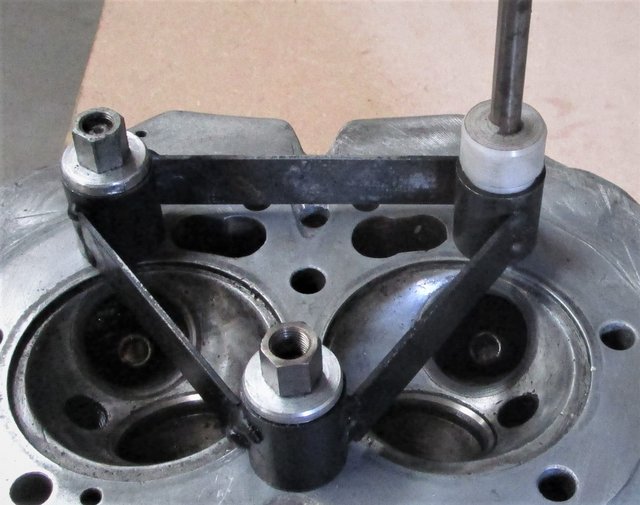
Here's one of my must useful "tools". Its 1/4" aluminum and is most commonly used to push crankshafts out of engines. It is not normally needed for Nortons due to the roller bearings on both sides of the crank.

This engine still has the ball bearing on the timing side and the original-type roller bearing on the drive side. It also had the pistons that liked to lose their tops. The cases came apart easily, but I tried for a long time to get the crank out of the timing side bearing. It didn't help that the pistons would not move in the small ends and the crank would not move in the cases. So, I got out my trusty tool mead three holes for bolts to screw into the timing cover screw holes, and one threaded hole to push on the end of the crank. Then put a sleeve over the end of the bolt so it could not damage the crank. Put a little heat on is and to pushed right out of the bearing by tightening the bolt to the crank. This has been used on many Triumph and BSA engines of various sizes and a few other things - hence all the holes.


Tools You Have Made to Maintain your Norton
 
I made a very similar tool to pull the cylinders off a set of P11 pistons. It worked very well...sure beats pounding on the pistons with a hammer.
 
  • Like
Reactions: baz
This is not a tool but something I think might be helpful in maintaining our great machines.
I came across a lubricant called TAC2 (it's a CRC Adhesive Lubricant) as part of the purchase of my 1928 ES2.
I thought I'd try it on the three arduous dry areas of the Commando:
* Side stand pivot
* Kick start pivot (I have the RGM long one)
* Centre stand pivot
I can report that it has lasted a year in all three locations - that's 3500 miles and about 250 - 300 kicks, without need for re-application.
Thoroughly recommended!!

PS - it's for lubricating the exposed rockers/springs/etc on the ES2 head
 
Last edited:
This is not a tool but something I think might be helpful in maintaining our great machines.
I came across a lubricant called TAC2 (it's a CRC Adhesive Lubricant) as part of the purchase of my 1928 ES2.
I thought I'd try it on the three arduous dry areas of the Commando:
* Side stand pivot
* Kick start pivot (I have the RGM long one)
* Centre stand pivot
I can report that it has lasted a year in all three locations - that's 3500 miles and about 250 - 300 kicks, without need for re-application.
Thoroughly recommended!!

PS - it's for lubricating the exposed rockers/springs/etc on the ES2 head
CRC sell ” chain lube pro” in Europe , which may be the same thing, but not Tac2, after a search on their Europe distributor. It sprays as oil and sets as grease , they say.
 
CRC sell ” chain lube pro” in Europe , which may be the same thing, but not Tac2, after a search on their Europe distributor. It sprays as oil and sets as grease , they say.

I make a version of this stuff myself ......

Put a dollop of wheel bearing grease in a pump oiler, fill with petrol, and shake well.

Slick
 
Back
Top