
You are using an out of date browser. It may not display this or other websites correctly.
You should upgrade or use an alternative browser.
You should upgrade or use an alternative browser.
Tools You Have Made to Maintain your Norton
- Thread starter texasSlick
- Start date
Dellis
VIP MEMBER
- Joined
- Jul 22, 2018
- Messages
- 410
A drill guide to drill pilot hole in a sheared off mudguard mount on a fork leg. One side is drilled 1/4" all the way through to locate on a good stud/part stud and the other side is drilled 1/4" part the way through to locate on the sheared stud and 3.5mm all the way through to guide and centralise a 3.5mm drill to drill into the snapped stud.
Mounted thus.
Drilled.
And the resulting hole, 100 times better than just by hand. You need to file the end of the snapped stud square then centre punch the middle (or use a 3.5mm transfer punch to get the punch mark central) and drill the hole for your extractor.
Dave
marshg246
VIP MEMBER
- Joined
- Jul 12, 2015
- Messages
- 4,142
Excellent! I bet you could sell a few. The same basic idea could be used for making a drilling guide to do thread repairs for the studs in the head.View attachment 95108
A drill guide to drill pilot hole in a sheared off mudguard mount on a fork leg. One side is drilled 1/4" all the way through to locate on a good stud/part stud and the other side is drilled 1/4" part the way through to locate on the sheared stud and 3.5mm all the way through to guide and centralise a 3.5mm drill to drill into the snapped stud.
View attachment 95109
Mounted thus.
View attachment 95110
Drilled.
View attachment 95111
And the resulting hole, 100 times better than just by hand. You need to file the end of the snapped stud square then centre punch the middle (or use a 3.5mm transfer punch to get the punch mark central) and drill the hole for your extractor.
Dave
Dellis
VIP MEMBER
- Joined
- Jul 22, 2018
- Messages
- 410
However, the studs were stuck fast and I didn’t want the aggro of getting a broken stud extractor out so I took the forks out, milled the offending studs out drilled and re-tapped the holes. A word of caution; there isn’t a lot of meat between the hole and the inside if the fork leg so if you go with this option proceed with caution, I drilled a 6.8mm hole 10mm deep and that was as deep as I’d go without risking breaking through to the inside. I then tapped M8 (yes I know) and refitted the mudguard with mushroom heads.

Dellis
VIP MEMBER
- Joined
- Jul 22, 2018
- Messages
- 410
So now I’ve dispensed with studs the guide is up for grabs FOC to the first person to message me including free worldwide postage. All that I ask is that you have a need for the guide i.e. you have a sheared stud and you give a couple of quid to charity.
Cheers
Dave
Cheers
Dave
- Joined
- Oct 28, 2014
- Messages
- 1,872
I will suggest heating the area before engaging the extractor. A little penetrating oil too.
Dellis
VIP MEMBER
- Joined
- Jul 22, 2018
- Messages
- 410
I tried both, the penetrating oil had been on for 24 hours and I heat cycled the leg a couple of times hoping that the different expansion rates would break the grip but to no avail. I got a really good grip with the extractor and wound it in as tight as I dared but didn’t want to snap it as that is a whole new world of pain.I will suggest heating the area before engaging the extractor. A little penetrating oil too.
Dave
- Joined
- Oct 28, 2014
- Messages
- 1,872
I mean heating it to about 150 degrees or higher just before turning the extractor. It usually does the trick but maybe yours was too frozen. I usually heat it then flood it with penetrating oil and carefully try to work the broken stud a little forward and a little backward hoping that will allow the oil to penetrate. You're right...a broken extractor is much pain and aggravation.
Dellis
VIP MEMBER
- Joined
- Jul 22, 2018
- Messages
- 410
I know exactly what you’re saying, I did get it good and hot with a wet rag round the top of the leg to stop the seal and gaiter melting but it was frozen solid.I mean heating it to about 150 degrees or higher just before turning the extractor. It usually does the trick but maybe yours was too frozen. I usually heat it then flood it with penetrating oil and carefully try to work the broken stud a little forward and a little backward hoping that will allow the oil to penetrate. You're right...a broken extractor is much pain and aggravation.
Dave


mean gene
VIP MEMBER
- Joined
- Dec 21, 2020
- Messages
- 1,202
I'm sure you older and more experienced bike mechanic's know this trick but I just found it today. While re jetting a pair of Amals' on my Norton. The slide needle just would not line up with the hole in carb, the bowel was already off so I removed the main jet holder. Then took a cocktail straw and ran up thru the carb body, started the needle jet into straw then slide everything into place. Once the slide was bottomed out I removed the straw and installed main jet holder.. Much easier then removing the air cleaner! KISS theory works!
BERT
VIP MEMBER
- Joined
- Nov 23, 2020
- Messages
- 609
Did you finish your drink first?I'm sure you older and more experienced bike mechanic's know this trick but I just found it today. While re jetting a pair of Amals' on my Norton. The slide needle just would not line up with the hole in carb, the bowel was already off so I removed the main jet holder. Then took a cocktail straw and ran up thru the carb body, started the needle jet into straw then slide everything into place. Once the slide was bottomed out I removed the straw and installed main jet holder.. Much easier then removing the air cleaner! KISS theory works!
- Joined
- May 5, 2017
- Messages
- 657
Dave,However, the studs were stuck fast and I didn’t want the aggro of getting a broken stud extractor out so I took the forks out, milled the offending studs out drilled and re-tapped the holes. A word of caution; there isn’t a lot of meat between the hole and the inside if the fork leg so if you go with this option proceed with caution, I drilled a 6.8mm hole 10mm deep and that was as deep as I’d go without risking breaking through to the inside. I then tapped M8 (yes I know) and refitted the mudguard with mushroom heads.
View attachment 95112
Sorry I'm late to this thread. Nice repair job. Generally, in that situation, I drill out the broken stud and/or bolt using the correct drill bit so I can install a HeliCoil insert. That way, you keep the fastener at the original size. In this case 1/4" X 20 TPI, which calls for a 1/4" drill bit. This is a common problem when removing fasteners screwed into aluminum engine and transmission parts in the automotive world. Where depth is limited, I've been known to turn the HeliCoil tap [taper tap] into either a plug tap or a bottoming tap.
- Joined
- Oct 28, 2014
- Messages
- 1,872
PETCOCK TOOL...shipping to Australia & New Zealand.
The postage prices have come down to a much more reasonable $20. I have 4 left.
The postage prices have come down to a much more reasonable $20. I have 4 left.
- Joined
- Oct 28, 2014
- Messages
- 1,872
I will offer a technique rather than a tool.
Quick way to find center of a round part such as a tube to prevent the drill bit walking. If you have a drill press or mill.
Clamp the tube in the drill press vise. Get as close as possible to center by sight. Then take a thin piece of stock ( I use a loose feeler gauge .030)
under the drill and see if it lays flat or tips one way or the other. Move your vise accordingly. It is possible to be very accurate using this method. The final check is to remove the feeler gauge and see if the drill deflects in any direction. Practice on a scrap piece of tube to get the feel for it.
texasSlick
VIP MEMBER
- Joined
- Jan 2, 2013
- Messages
- 4,174
I will offer another technique:
If you need a crimp tool but do not have the proper sized die, do this:
Drill a hole in a piece of scrap flat stock, near the edge. Size the hole barely large enough to pass over the parts to be crimped. Using a hacksaw, cut a slot from the edge of the flat stock, thru the hole center. Place the parts in the hole, and the flat stock in a vise. Squeeze the flat stock at the hacksaw cut.
A variation of this technique:
Take two pieces of flat stock and clamp together. Drill a hole centered in the gap between the two flat plates. Size the hole as above. Place parts between the flat plates and squeeze in a vise.
Slick
Richard Tool
VIP MEMBER
- Joined
- Aug 3, 2019
- Messages
- 1,412
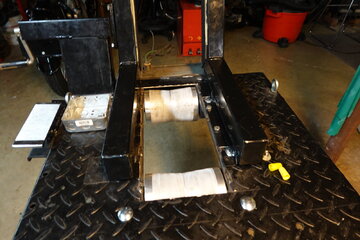
? ? You’ve got me Greg …Here's a tool I thought about a longtime and finally made. Works much better than expected. The 6 bolts are 5/16" and the aluminum plate is replicated on the other side of the 2x4. Any guesses what it's for?
View attachment 96797