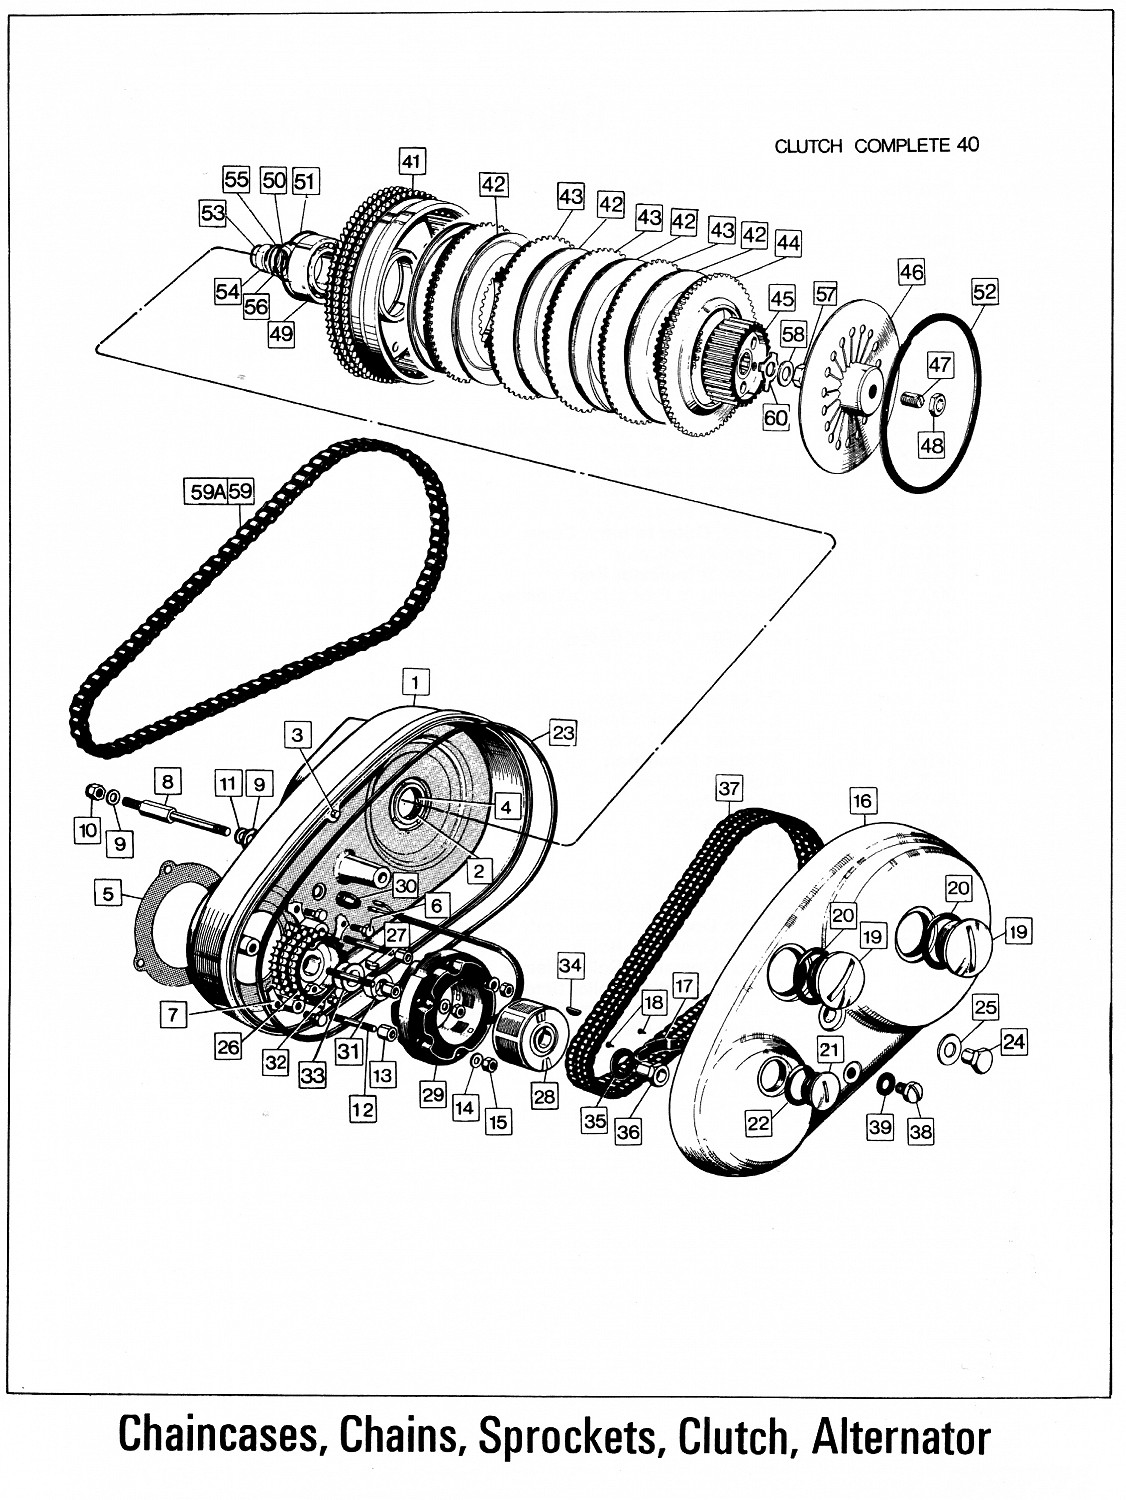
Okay, he we go. Here are two shafts side-by-side. The bottom one is like the one in my gearbox, the top one is what I believe to be a Commando one, but honestly I don't know a lot about Commandos, so I can't be 100% certain. The upper shaft does look like a more modern design to me, as it has provision for an o-ring seal on the clutch end to keep gearbox oil in the gearbox:
View attachment 95982
Close-ups:
View attachment 95983
View attachment 95984
Just looking at the two side-by-side, I suspect that even on the Commando shaft you woul dat least need to removed the sleeve behind the bolted-on plate so that the end of the splines could butt up against the backside of the bolted-on plate. Even so, I'm not sure that the clutch sprocket would line up properly with the drive sprocket. I'm sure it could all be made to work, but yeah, it would have to be "made to work".
I would like to make it clear at this point that I would welcome the input of anybody who has installed one of these clutches successfully in a P11 or Atlas before. By all means, if you see what I am doing wrong, please reply! I'm reasonably sure I have found a solution that will work just fine, but if you see what I did wrong, let me know.

")