A journey-1972 Commando Roadster

Joined
Nov 22, 2020
Messages
42
Country flag
This story began several years ago. My first ever bike was a 1970 BSA Lightning that I purchased in 2004 and had to completely rebuild. It was a huge learning experience-a friend of mine painted the tank and side panels, and I had a machine shop bore the cylinders and ground the crank. The rest I did myself.

A journey-1972 Commando Roadster

The night I brought it home in 2004.

A journey-1972 Commando Roadster

Almost complete-a couple of years later.

Fast forward a few years when I purchased a 1968 Triumph Bonneville from my buddy, Dennis B, in 2016. He was getting rid of it as he had a number of other bikes, including a 1950s vintage Royal Enfield and two Norton Commandos. When we rode together, he would always ride one of the Nortons.

A journey-1972 Commando Roadster

Dennis finding a loose coil wire after the engine kept missing.

Now with the 1968 Bonnie, I thought it would be fun to have a 1972 Commando. I made a deal with Dennis that if he ever sold either of his Commandos that I would have first right of refusal. After a while of waiting I managed to find a 1972 Commando down in Charleston. The company I worked for at the time was located in Charleston and I had to drive down there the following week. I spoke with the owner who said he was going to be around so I scheduled a meeting for that Monday.

On my way south, I phoned a friend to tell him what I was doing and mentioned how I was looking forward to working with Dennis on the rebuild. He informed me Dennis has just passed due to a massive stroke. It was a sad beginning to this project, but in the end, I picked it up. The nice thing was that the mileage and per diem from that trip paid for the bike, so essentially my Norton was free to me.

A journey-1972 Commando Roadster

Finally at home-2018.

A journey-1972 Commando Roadster


The story the owner gave me was that the bike has been under a guy's house in Charleston. After he passed, his family was going to throw it away. While at the dump, the owner's friend asked what they were doing and they ended up giving it said friend who then gave it to the owner. His intention was to restore it, but life and retirement got in the way, so he sold it to me.

The first thing to do was get it registered. Fortunately, I didn't anticipate the owner having a title, so I brought a Vermont Bill of Sale form. Several hundred dollars, a trip to the state police barracks to verify serial numbers and that it wasn't stolen, and a few weeks later I had it registered! The last registration was in 1981.

A journey-1972 Commando Roadster

There was also a SC registration on the forks that expired in August 1981.

So now that the bike is legally mine, and other projects are out of the way (or nearly so), it's time to begin digging into this beast for a ground up restoration to make a nice looking, useable rider. Fortunately I'm up to date on my tetanus shot!
 
Last edited:
The first thing to do was remove the front caliper so I could roll the bike around the garage. The brakes worked in some capacity but didn't release. Miraculously the bolts came out of the caliper and the caliper slipped off the rotor with relative ease.

A journey-1972 Commando Roadster


It was weird that there was no brake fluid that came out of the line and only a very little that came out of the caliper. Next, I opened the master cylinder.

A journey-1972 Commando Roadster

It looks like someone dumped desiccant into the master cylinder!

That was it for the evening as I had to prepare to go overseas for work the following day.
 
Welcome, @Beezer Josh

That gas tank is 1/4 full of DAYLIGHT!!!

That will be a really great "before" photo, to contrast the eventual "after" photo...

Your BSA resto is a real beauty. Gotta love the Power Eggs!
 
Fast forward a month, and I'm back from sea and ready to really tear into this thing. I've got two months at home, so I really want to put a dent into this project.

First thing was to remove the brake line. The clips on the headlight ear came off easily. Getting the electrical lines out of the rubber boot was a tad difficult; the rubber was pretty stiff. Not sure if that's because it's 48 years old or if new rubber would be the same.

A journey-1972 Commando Roadster

Brake line clamps were easily removed. What a rusty mess.

Next was the headlight bucket. Before I removed it, I photographed the lay of every cable. That was something I miss about having very incomplete bikes to start with so I find this a rare treat! The wiring in here is very simple.

A journey-1972 Commando Roadster

Not a rat's nest! South Carolina registration expired 8/1981.

Once the wiring was pulled through, it was time to remove the bucket. The left hand bolt was fairly easy to remove, but the right was a real bear. Looking back at the picture, it's obvious why.

Next were the speedometer and tachometer. I still have no idea if they work, and I need to find my little bit of cable I use as a tester after I rebuild my instruments-fingers crossed!

A journey-1972 Commando Roadster

Only 4628 miles on the bike.

As the final part of the day, I removed the gas tank from the bike. Boy, what a rusty mess! It basically fell apart, but I kept it in case I need it for the paint patterns. The side panels came off in one piece. The next few days were spent photographing the wiring so it goes back in the correct locations. I won't bore you guys with these.

Question of the day: is there a recommended painter in the states for the tank and side panels?
 
Fast forward a month, and I'm back from sea and ready to really tear into this thing. I've got two months at home, so I really want to put a dent into this project.

First thing was to remove the brake line. The clips on the headlight ear came off easily. Getting the electrical lines out of the rubber boot was a tad difficult; the rubber was pretty stiff. Not sure if that's because it's 48 years old or if new rubber would be the same.

A journey-1972 Commando Roadster

Brake line clamps were easily removed. What a rusty mess.

Next was the headlight bucket. Before I removed it, I photographed the lay of every cable. That was something I miss about having very incomplete bikes to start with so I find this a rare treat! The wiring in here is very simple.

Question of the day: is there a recommended painter in the states for the tank and side panels?
Brent.


I still have a few stray spare Commando parts when it comes time to replace stuff. Close to giveaway pricing + postage.

As a matter of fact, I got a dented tank recently that can easily be restored...

I also have a decent spreadsheet with like 50 line items of major components/assemblies you can use for planning parts needed, etc. I can send you a copy via e-mail.
 
The good news is that almost all the parts are still available. The bad news is they add up quick.

I am working on my '72 which had been sitting since '95, but mostly inside.


It seems these bikes were engineered to make things as complicated they possibly could.

Good luck
 
@gortnipper, I'll have to contact Brent when I can procure another tank. There's no bringing this one back.

@grandpaul, thanks for the offer. Did you make it to the Britbike Reunion? Tom (ricochetrider) asked if I was interested, but I was about to leave the country for work and there were some somewhat stringent covid requirements to get on the ship.

@TomU I've been following your post-very interesting. I've spent the past several months scouring the internet to soak up all the information I can find.
 
So continuing with the wiring, there were some interesting bits, including the old battery. The case was clear plastic and you could see the cells. I guess the original straps were toast and the PO had held it in place with some wiring and plastic tubing.

A journey-1972 Commando Roadster

I think a squirrel lived in here at one point.

The coils are pretty corroded on the outside, but the brackets are definitely salvageable. Is that some sort of turn signal relay in the coiled bracket?

A journey-1972 Commando Roadster

Wires to the coils for color coding.

At first glance the wiring harness looks really good and might be reusable. I'll have to hook it up to a megger to make sure all the wires are good before reusing it. With the wiring fully documented and removed, the next step is to take a crack at the engine. Something (or multiple somethings) are seized here. I'm not sure if it's the engine or the gearbox at this point. As an indicator, I broke into the points plate to get a clue as to what's going on.

A journey-1972 Commando Roadster

The points plate.

As will become a theme with this bike, a little bit of broken down oil and a little bit of water don't make a very nice mix after almost 40 years.
 
Last edited:
@grandpaul, thanks for the offer. Did you make it to the Britbike Reunion? Tom (ricochetrider) asked if I was interested, but I was about to leave the country for work and there were some somewhat stringent covid requirements to get on the ship.
No, I didn't make it.
 
At first glance the wiring harness looks really good and might be reusable. I'll have to hook it up to a megger to make sure all the wires are good before reusing it. With the wiring fully documented and removed, the next step is to take a crack at the engine. Something (or multiple somethings) are seized here. I'm not sure if it's the engine or the gearbox at this point. As an indicator, I broke into the points plate to get a clue as to what's going on.
Be careful with the harness. Take a look at the junction block under the tank, it and all the other female junctions and a minimum will need to be replaced, as the metal will be breaking inside of them in no time.


I would strongly urge a new harness, or making your own. 40 yr old wiring is not worth the troubleshooting on reassembly, especially as you will have a new motor and all other rubber bits.


Take out the plugs and pour some diesel or PB Blaster down into the cylinders and let it soak for a couple days.
 
@L.A.B. thanks for the info! It appears to function similarly to the charging light on my '73 BMW and the oil pressure light on my BSA at idle.

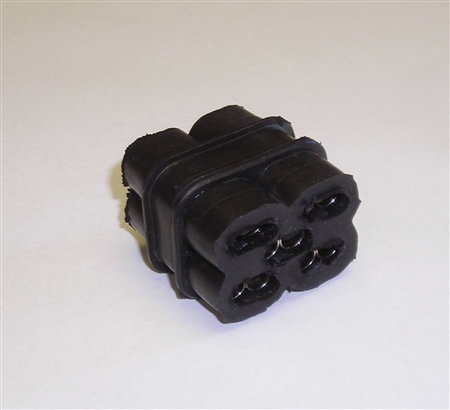
@gortnipper the junction block under the tank is completely toast. The rubber's broken down into some mushy substance. I've used britishwiring for a number of things-they're great to deal with and I will certainly do business with them again. One of the things I like about the megger is that it's a continuity test with much higher voltages. It's what we use to test subsea systems, mostly through kilometers of cable. Some of the connectors need to be polished up, but where the wire has stripped out of the connector, the copper still looks good. I'll certainly purchase a new one if I'm not completely satisfied with the results of my electrical tests, but I'm leaving most options open this early in the project. Here's a picture of what's left of the junction block under the tank.

A journey-1972 Commando Roadster
 
Last edited:
As an FYI to those reading this report, I'm about 10 days behind writing from where I am currently in the project.

After the wiring, tank, and rear fender were removed, here's where I was in the project.

A journey-1972 Commando Roadster

Looking a little leaner.

Fortunately, everything has come off easily so far for such a rusty bike. After removing that AA cover, the points plate, and the AA, I was eager to see the damage inside the timing cover, so off it came.

A journey-1972 Commando Roadster

A little soda blasting and a lot of polishing should see this cover right.

A journey-1972 Commando Roadster

Ugh, the beginning of the sludge.

I am well familiar with the smell and consistency of 40+ year old oil. Still not a fan. After some initial cleanup, everything in here looks reusable. Nothing is corroded, but the oil pump will be disassembled and cleaned out. The bolts going through the pump are punched to prevent them backing out. I found this interesting as it's the first time I've come across it.

It was at this point I ordered the appropriate pinion puller and the clutch spring compressor, so that took a few days to receive. However, in the meantime I decided to open up the primary side to see what's in there.

A journey-1972 Commando Roadster

More sludge and some very slight surface rust.

Again, everything looked good but gunked up in sludge. It all wiped out with relative ease.
 
Although the wires inside the wire harness may / should be good, with that general level of corrosion (in fact I wouldn’t say it’s corroding... I’d say it’s decomposing!) the issue is likely to be that the bullets themselves, the joint to the wire and the first inch or two of the wire inside the insulation, will all be corroded. Something that pulling off the old female connectors ain’t gonna help.
 
Took the wife out on the '73 BMW today. What a nice afternoon in southern Maryland, even if just a tad on the chilly side! How's riding 2-up on a Norton?

To pick up where I left off, while awaiting the arrival of the special tools. I ground off an Allen wrench to remove the carbs. Boy, what a pain! I spent additional time bead blasting and painting some parts. After a few days the pinion gear extractor, clutch spring compressor, and exhaust nut wrench finally arrived. Now I was able to make some good progress.

With everything in the timing side removed and somewhat cleaned up, I'm pleased with the results.

A journey-1972 Commando Roadster

Timing side without the pinion gear removed.

Next came the head. The left hand exhaust was easy to remove and the collar backed out without issue. The threads look good! The right hand was stuck though. I completely destroyed the collar trying to remove it. In the end I simply cut off the holey right hand exhaust pipe. After removing all the fasteners-the only one that broke was the hidden middle one on the top-and a little pounding, the head came off. Overall, I'm pretty pleased with its condition. I just need to extract the broken remnants of the exhaust collar. New valves, guides, springs, and maybe new exhaust threads and it should be good to go.

A journey-1972 Commando Roadster

Primary side exhaust port.

A journey-1972 Commando Roadster

Timing side exhaust port with the remnants of the exhaust collar and tail pipe. I'm hoping to be able to collapse it now that I can get a better angle on it.


A journey-1972 Commando Roadster

The combustion chamber doesn't look too bad. I just need to extract the broken spark plug.

The inside of the cylinder showed a lot of corrosion. I'm sure some of it came from hitting the head. Unfortunately, the cylinder wouldn't budge from the pistons, so my plan was to remove the remaining lower engine, split the cases, remove the connecting rod caps from the crankshaft so I can deal with the connecting rods, pistons, and cylinder separately.

A journey-1972 Commando Roadster

Corrosion in the cylinders.

With the clutch, rotor, and sprocket removed, the inner timing side case came off pretty easily.

A journey-1972 Commando Roadster

Engine and gearbox sans primary cover.

It's at this point that I get a clue as to why this bike was laid up. Everything on the engine moves except for the cylinder. I suspect the piston rings corroded to the cylinders after the bike sat for the past 30+ years. However, nothing on the gearbox will budge. That's where I left it for the night.
 
The next day, I was able to remove the engine from the frame and get it onto the work bench.

A journey-1972 Commando Roadster

On the workbench where it will be easier to work on.

I removed the rear breather. What a mess! That goopy oil continued to pour out. Then it was all the bolts and screws to split the cases. I thought I had them all out, but missed one of the recessed screws. Lesson learned, but it eventually came apart.

A journey-1972 Commando Roadster

The last screw holding everything together.

A journey-1972 Commando Roadster

More sludge.

A journey-1972 Commando Roadster

And more. What a mess!

A journey-1972 Commando Roadster

Crankshaft, connecting rods, pistons, and cylinders.

Eventually I get the connecting rods separated from the crankshaft. The journals look good, but I'll eventual mic them out.

A journey-1972 Commando Roadster

Crankshaft journals.

A journey-1972 Commando Roadster

The stuck bits.

With the cases and crankshaft somewhat cleaned up and stored for a more thorough cleaning later, it was time to deal with the stuck pistons. Time for a good heat soak. I used half ATF, half gasoline, and an oily rag in each to act as a wick.

A journey-1972 Commando Roadster

Cylinders on fire.

After the fire went out, I move the cylinders back indoors. Now, I'm not a very patient person, so instead of waiting for them to completely cool and knowing I would likely need a rebore, I used a drift and began pounding on the timing side piston. I knew better than to not spread the load and ended up punching a hole in the top. Oh well, I wasn't going to reuse these pistons anyway. Next, I began to drill. The bit slipped out of one of my punch marks and nicked the cylinder wall. I'm hoping it's shallow enough that the anticipated rebore to +.020" will take care of it. At that point, I was frustrated and walked away for the evening to let the cylinder completely cool.
 
Back
Top