John Player Special restoration project

Right side cylinder didn't fully clean up at .020" over, but should be fine; it wasn't smoking the last time it ran. (front faces in view)

John Player Special restoration project


Sides are reversed, these are the rear faces of the bores

John Player Special restoration project


Bottom of the spigots; sides are reversed (looking at front faces of the bores)

John Player Special restoration project


Rear faces of the bottom of the bores.

John Player Special restoration project
 
Cylinders were boiled clean, scraped and detailed a few spots, then 2 coats of Rust-O-Leum gloss black rattle can.

John Player Special restoration project


Drying in the sun; we had a nice warm & sunny day today.

John Player Special restoration project


"Before" shot of the chain oiler.

John Player Special restoration project


Genuine AN original footpeg rubbers, although incorrect for the JPN; should be "oval" shaped bits.

John Player Special restoration project
 
Balance of the new fairing parts arrived, including the more original tank. Original JPN extension weld just like my other tank.

John Player Special restoration project


Underside of the tank is in near original condition

John Player Special restoration project


A bit of surface rust from non-use. Supposedly, this tank never had fuel in it.

John Player Special restoration project


Just a bit of "shelf" rust inside the tank...

John Player Special restoration project
 
Baffles & hump look almost new

John Player Special restoration project


Tank looks great from 10 feet, has a few little chips on the paint at the edges here and there and a slightly dinged rear corner lip with a paint crack; no biggie as it gets covered with the shroud. I might have my painter touch it up.

John Player Special restoration project


Quick mockup of the tank; chainguard installed.

John Player Special restoration project
 
Polished bits also arrived on the same UPS truck this afternoon. Now the forks and bottom end can go back together, FINALLY!

John Player Special restoration project


All the fairing mounting hardware is present and correct.

John Player Special restoration project
 
These are not English headlights; but have never had power to them.

John Player Special restoration project


Modern dual headlight harness with relays and simplified wiring.

John Player Special restoration project


Original JPN dual headlight harness with proper wiring color coding (also includes turn signal wiring)

John Player Special restoration project
 
Front brake lever & reservoir cap polished and installed

John Player Special restoration project


Clutch lever polished and installed. I chose NOT to polish the thumb switch covers; might send them off as they stand out...

John Player Special restoration project


Controls looking more complete

John Player Special restoration project
 
"After" shot of the chain oiler nice and spiffy now; it will be fully pinched off, just for originality.

John Player Special restoration project


Left side Z-plate, footpeg, brake pedal & muffler hangar hardware in place loosely

John Player Special restoration project


Right side folding peg, z-plate & muffler hangar done, but loosely installed for now

John Player Special restoration project


Bloody L-O-N-G day today; also built a small greenhouse for my wyfe, supervised A/C & heater repairs, and cleaned up & photographed the old JPN fairing & tank cowl for eventual sale.
 
I've always wondered what the fuel tank looked like under the JPN fiberglass. I think I'd be tempted to ride it around without all the fairing parts for awhile just for fun.

Excellent documentation. I envy your energy and enthusiasm!
 
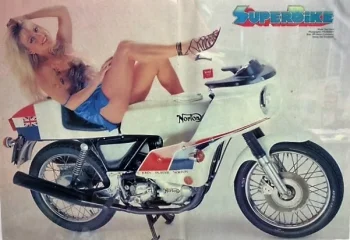
Please tell me the girl has been Photoshopped onto the bike photo.
She's got her shoe on the Plexiglas!
 
Rods cleaned, new bearing shells oiled and rods torqued to 25 ft/lbs. They rotate real nice and smoothly.

John Player Special restoration project


Crank main seal pocket cleaned out

John Player Special restoration project


New crank main seal in place

John Player Special restoration project
 
grandpaul said:
nipped everything in place with every other case bolt till it gets set in the frame

What is the advantage of doing it this way? Surely, when originally assembled, the engine cases were properly torqued together and any fettling was done with the mounts??
 
gortnipper said:
grandpaul said:
nipped everything in place with every other case bolt till it gets set in the frame

What is the advantage of doing it this way? Surely, when originally assembled, the engine cases were properly torqued together and any fettling was done with the mounts??

If I torque the cases now, on the bench, it would all have to be loosened off to set it in the frame/mounts, then re-torqued again.

Once it's in the frame, I'll torque the case bolts.
 
Front wheel bearings still had some relatively clean grease; I repacked them.

John Player Special restoration project


New fork seals, couldn't match the exact originals.

John Player Special restoration project


Forks done.

John Player Special restoration project


Chassis ready to roll

John Player Special restoration project
 
Cam drive & oil pump installed

John Player Special restoration project


New screw and bevelled edge of nut in toward sprocket; teeth are virtually as new (just for komet)

John Player Special restoration project


Lower lump in the chassis, just need to install the front mount and torque the cases in.

John Player Special restoration project
 
Back
Top