guest76
Guest
- Joined
- Nov 5, 2012
- Messages
- 1,034
Keep talking said I...
Well, my German guy had taken this engine with a few other bits and pieces as a bad debt, but he had not been able to sell it on, because of what had been done to it and because it was a Combat engine.
He had approached a few Commando riders, and no-one was interested.
"Could you believe that some idiot had thought about putting it in an old frame, and had got the crank re-balanced at 78% to do it."
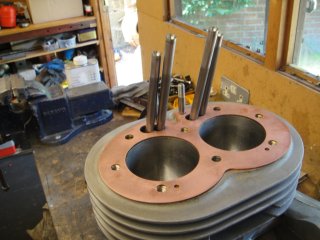
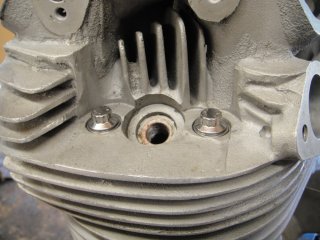
The engine needed some work, but the basics were all there - the bottom end had been built up by Mick Hemmings (balanced, superblends, case drilled for breathing/oiling), and the head had come over from Norman White who'd lapped in new valves, repair one of the exhaust threads and done some gas flowing on the internals.
The engine had been loosely assembled, and had been sat under a bench for almost ten years.
Needless to say I bit his arm off, and bought the engine straight away!!!!
My project had just taken a new turn!
Well, my German guy had taken this engine with a few other bits and pieces as a bad debt, but he had not been able to sell it on, because of what had been done to it and because it was a Combat engine.
He had approached a few Commando riders, and no-one was interested.
"Could you believe that some idiot had thought about putting it in an old frame, and had got the crank re-balanced at 78% to do it."
The engine needed some work, but the basics were all there - the bottom end had been built up by Mick Hemmings (balanced, superblends, case drilled for breathing/oiling), and the head had come over from Norman White who'd lapped in new valves, repair one of the exhaust threads and done some gas flowing on the internals.
The engine had been loosely assembled, and had been sat under a bench for almost ten years.
Needless to say I bit his arm off, and bought the engine straight away!!!!
My project had just taken a new turn!

 So now you're at the fork in the road :wink: is a TTI gear box in the cards to go behind such a deserving wayward commando engine.....How much money ya got. :roll: This is one fine thread brother. However you've made that ES2 so beautiful and done such a fine job on it, I for one vote that it goes back into it's frame and you wait and see what turns up in the way of frame / chassis for your next build, a bitsa with a combat motor :mrgreen: