Grant's Featherbed Special

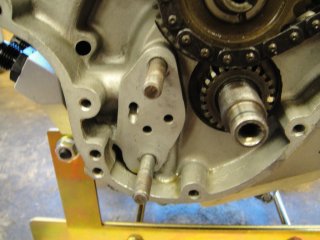
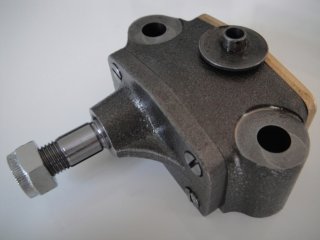
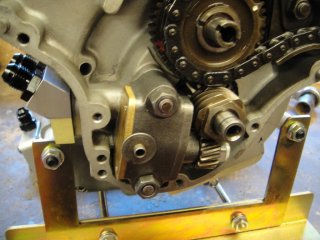
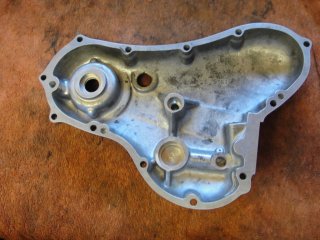
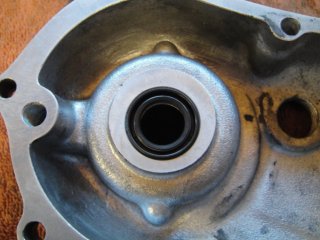
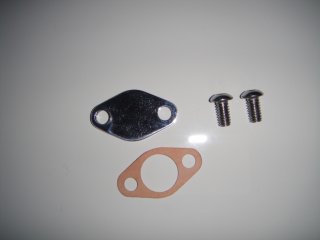
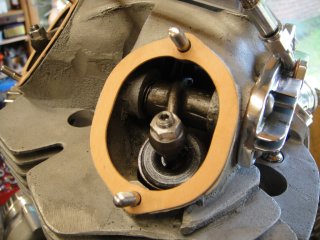
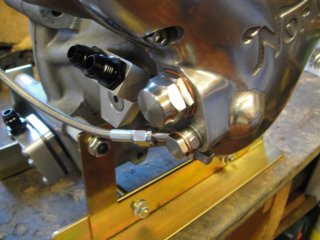
Time to turn our attention to oiling

We gave the area around the oil pump a really good clean


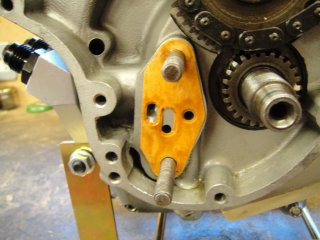
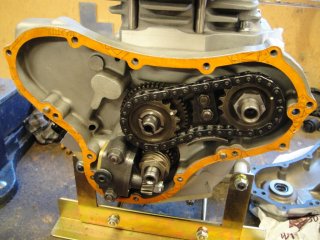
Made sure that the Wellseal soaked gasket was put in place the right way round.

Ensure you double check this - not the case with this particular gasket, but I have seen universal fit ones with slots instead of holes that supposedly can be fitted either way up - however, the alignment of some of those still overlaps the holes by too much.
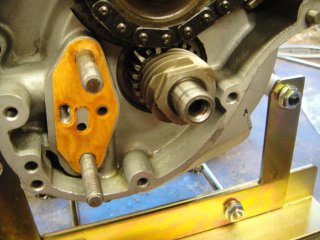
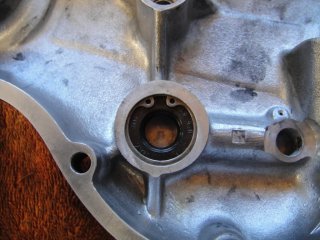
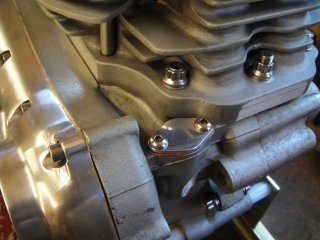
 

Attachments

  • Grant's Featherbed Special
    112.JPG
    515.6 KB · Views: 378
  • Grant's Featherbed Special
    113.JPG
    541.3 KB · Views: 402
Here are the new six start work drive and pump sprocket.

These were bought from Andover Norton


The new worm drive in place - don't forget this is left hand thread.
 

Attachments

  • Grant's Featherbed Special
    114.JPG
    437.1 KB · Views: 390
  • Grant's Featherbed Special
    115.JPG
    568 KB · Views: 405
Shiny new oil pump from Andover Norton

I actually stripped it down and polished up the internals - probably rendering the warranty totally void - but i think well worth doing anyway.

It was brand new, so of course there was no scoring or damage.
However, there was a little bit of looseness between the internal gears and the top/bottom covers which I completely eliminated by polishing it.


Here is the pump and sprocket fitted.
 

Attachments

  • Grant's Featherbed Special
    116.JPG
    461.3 KB · Views: 378
  • Grant's Featherbed Special
    117.JPG
    569.2 KB · Views: 382
I decided to go for a Mark 3 timing cover


Although it is not a smooth as the original one, I really like the idea of the anti-sumping mod that Norton did to this as standard - seems like the learnt by their own mistakes on some things!!!

From what i can see, it is the same as sending the cover to AMR for the timing cover modification

Although they only charge 70 bucks, by the time I factor in shipping, it was the same price to get a Mark 3 cover from Andover
 

Attachments

  • Grant's Featherbed Special
    118.JPG
    469.6 KB · Views: 395
Last edited by a moderator:
I got the SRM http://www.srmclassicbikes.com pressure relief valve - it's a nice bit of kit.
Well made, and carefully assembled.


I made sure there was not swarf, and metal filings in the new cover - worth checking this, and actually quite a lot of crud blew out with the air line, from where the holes and oilways were drilled.


I particularly like with the SRM pressure relief valve that they make the valve body threads so that they will be a real tight fit in the timing cover.

Hopefully that means no leakage!


It would have been really cool if they made these for the Norton with a little tell-tale like you see on the Triumphs and BSAs
 

Attachments

  • Grant's Featherbed Special
    119.JPG
    432.8 KB · Views: 388
  • Grant's Featherbed Special
    120.JPG
    543.5 KB · Views: 354
  • Grant's Featherbed Special
    121.JPG
    510.4 KB · Views: 409
Andover Norton supply a nice little kit of parts when you buy the mark 3 timing cover


First job was to give everything a good clean


The oil seals were a VERY tight fit - we thoroughly oiled them up, and drove them home with a little drift we made out of nylon to exactly the correct diameters - this made sure there was no damage to the new seals


The seal was held in place by a little circlip - make sure it locates properly with that satisfying audible "click"


Finally the spring and the plunger - this is the check valve that sits against the oil pump.


I was reassured by how week the spring is - enough springiness to push against the oil pump when the engine is off, but not so much springiness that oil flow is held back or restricted in any way.

You'll remember my disappointment in the anti wet sump valve that the previous owner had fitted to the ES2 engine!!!

I will forever live in fear of these things - and have a much better solution planned for this engine!
 

Attachments

  • Grant's Featherbed Special
    122.jpg
    152.4 KB · Views: 353
  • Grant's Featherbed Special
    123.JPG
    640.9 KB · Views: 380
  • Grant's Featherbed Special
    124.JPG
    547.4 KB · Views: 362
  • Grant's Featherbed Special
    125.JPG
    593.6 KB · Views: 398
  • Grant's Featherbed Special
    126.JPG
    582.5 KB · Views: 410
The circlip on the oil seal would be better if it was reversed. Not a big deal in this instance but the sharp edge should face out. Where it is important is when the circlip is really holding something in place because the rounded edge can allow it to pop out.
 
gtiller said:
Cheers Dave!

Anyone that knows me also knows that i'm a bloody-minded, stubborn bastard.

And actually going up the bitsa route (albeit a Norton bitsa) has really allowed me to step outside the 'norm' and do a few interesting, and exciting mods.

For me, this is as much about an engineering project as anything else - and lots of little challenges and hurdles are what makes it interesting.
Building a special lets me do that!

...i will just need to steer well clear of the rivet counters in the future. Could you imagine what would happen if i blogged about my project over on the Norton Owners Club forum!!! :wink:

Don't worry about what others think, I copped a lot of flak when I decided to convert my Commando to a Featherbed in 1980 and my bike only a few years old from buying it new, but having a bike that is diffrent to what everone else has, one that you have built with your own hands and knowing every nut and bolt on your bike, then taking it out on its first run will be so rewarding and if done right first time you won't have much troubles at all, take your time to learn how to ride it and how it handles and getting use to the lightness, I am glad I went the way I did with my 850 Featherbed and after 35 years of riding it I still get that feeling when I first fired it up and took it out on the road.

Ashley
 
Looks like you've done such a nice job with the motor build of the ES2, it'd be a shame to put it to waste. If you've got any inclinations of selling it on, I'd surely be interested.
 
I can remove my motor, gearbox, primary and engine mounts all out in one lift, having two diffrent motors you could have 2 bikes in the one, but I know what motor will perform better with so much more power.

Ashley
 
@triumph2 thanks - i'll remember that one, and swap it over the next time i have the cover off.
 
On goes the timing cover gasket - again soaked in Wellseal to ensure i good seal.
I very nearly didn't paint this one in sealant because of the possible need to take the cover off for inspection and maintenance.
However, it's not something i'll be doing weekly, and the gaskets are cheap enough.


Shiny new timing cover bolts - not the bolts sets these days have been standardised regards length - i think i am right in saying there were three different lengths of bolt originally.
Now they are all the same except for one.


Finally the cover can be buttoned up!
 

Attachments

  • Grant's Featherbed Special
    127.JPG
    626.6 KB · Views: 369
  • Grant's Featherbed Special
    128.JPG
    478.5 KB · Views: 365
  • Grant's Featherbed Special
    129.JPG
    569.8 KB · Views: 364
My plan is to run an electronic rev counter, so this is a blanking plate to cover up the hole where the tacho drive once was.


Fitted - I look forward to not having the unsightly drive cable running up to the instruments - although not as ugly as the one on the Dominator (which is taken off the front of the timing cover) it is still a pain in the butt to deal with.
 

Attachments

  • Grant's Featherbed Special
    130.JPG
    365.6 KB · Views: 389
  • Grant's Featherbed Special
    131.JPG
    534.1 KB · Views: 347
I have these beautiful covers:


I wanted to fit these as a tribute and a nod to Sir Eddy!
They are investment cast rather than rough cast, so the density of the fins is higher and the finish is better.

Not hugely practical, and doesn't improve performance or reliability in any way at all.

BUT they look trick, and the money went toward getting Sir Eddy's bike back on the salt, so well worth it to me :D
 

Attachments

  • Grant's Featherbed Special
    132.JPG
    483.4 KB · Views: 372
Rocker spindle cover plates installed - i really like the fact that these are one piece.
So much easier to work with than the original setup.
 

Attachments

  • Grant's Featherbed Special
    133.JPG
    567.2 KB · Views: 392
I replaced the rocker adjusters and nuts for these allen key units.
The nuts are made of dural (aluminium) and are sacrificial - the idea is that the aluminium threads will deform slightly when tightened and are less susceptible to rattling loose.


I really don't like all the weird angles involved with he adjusters and the valves - the contact point is small, and the wear looks to be an issue.
I also looked at the mushroom type adjusters, but I have a feeling these would actually have the same issue, maybe even more exaggerated.

I plan to get a set of rockers to polish and lighten in the future, so this is an area I will look at and experiment with!


Even with the adjusters setup correctly, I didn't gunk these gaskets up with Wellseal.
I full expect some settlement of the new valves in the new seats, and the new pushrods - so the covers will be off and on again pretty regylalry to start with.


Sir Eddy's covers really are a great finishing touch!
 

Attachments

  • Grant's Featherbed Special
    134.JPG
    542.2 KB · Views: 387
  • Grant's Featherbed Special
    135.JPG
    624.2 KB · Views: 336
  • Grant's Featherbed Special
    136.JPG
    540.4 KB · Views: 347
Stainless braided hoses for the rocker oil feed


My hope is that these will last well, and not perish, fray, or leak
 

Attachments

  • Grant's Featherbed Special
    137.JPG
    413.8 KB · Views: 361
  • Grant's Featherbed Special
    138.JPG
    536.1 KB · Views: 348
I went for this cNw/Comstock inlet manifold.

It is a work of art, of course a perfect fit, and I particularly like the integral balance pipe.


I am really pleased with how this is all coming together - it makes such a difference to use quality parts!
 

Attachments

  • Grant's Featherbed Special
    139.JPG
    470.8 KB · Views: 364
  • Grant's Featherbed Special
    140.JPG
    577.5 KB · Views: 354
I'll get the timing perfected with a strobe light once the bike is in a position to be started up, but for now i used my timing wheel and digital gauge to find 28 degrees before top dead center

Excuse the camera angle - looking at it square on, it was 28 - honest!!!


Using a digital gauge and wheel to find true TDC (I did 40 degrees each side, so that I could account for any backlash) is so quick and easy - it will be interesting to see if the timing marks on the other side of the crank tally up!!!
 

Attachments

  • Grant's Featherbed Special
    142.JPG
    578 KB · Views: 345
  • Grant's Featherbed Special
    141.JPG
    533.1 KB · Views: 374
I installed the electronic ignition rotor as per the instructions in the manual


Based on the recommendations on this forum, I opted for the Tri-Spark http://www.trispark.com.au in the end.


I really was totally on the fence between Tri-Spark and Power Arc - both having great write ups and reviews.

Rightly or wrongly, i made my decision in the end based on inductance rather than optical - both are equally good I'm sure, but the idea of an optical solution running on a dirty old motorbike really didn't make us much sense in my mind.

As I say, both good - it was just personal choice, and a purely psychological decision.
 

Attachments

  • Grant's Featherbed Special
    143.JPG
    564.6 KB · Views: 366
  • Grant's Featherbed Special
    144.JPG
    588.2 KB · Views: 316
Back
Top