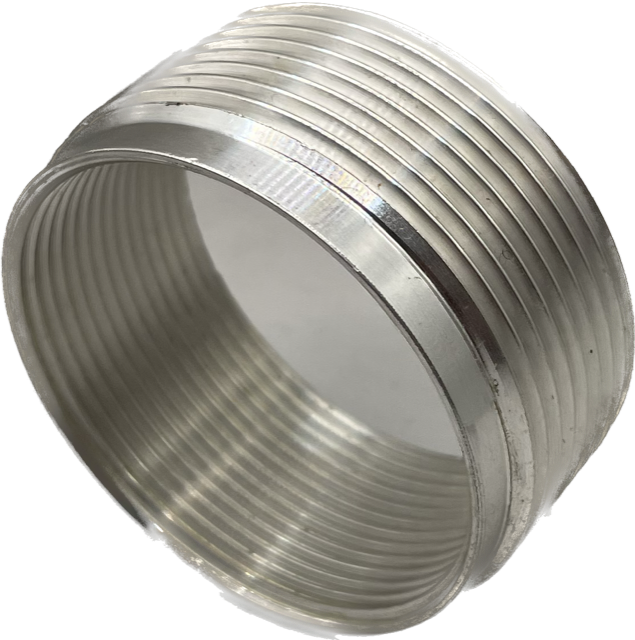
Exhaust nut woes

Pardon my ignorance, after the alu/brass sleeve job is done is problem completelt solved? Tighten up and done?
That's true for me with Jim Comstock's repair which is aluminum bronze, not brass. I suspect it is also true for similar inserts by others. Doubt it for Aluminum - I had one that was done with aluminum and failed so had it fixed by Jim.
 
  • Like
Reactions: baz
Thank you for sharing your story with me. mine are the original head threads that have finally crapped the tux. I think i'm going to try an insert, if i can figure out how to do it without taking the head off. Say you could go back and do the original repair on your's yourself, would you use a pressure fit or a thread in type?

I like how you did yours and i'm happy that it has held up so well for you. if i can't do an insert repair, maybe i'll do the beer can strips.
thanks again
When welding up an alloy cylinder for 920 sleeve fitment I did before and after checks for flatness of gasket surfaces.
I used a .0000" dial indicator which fits in the milling machine chuck. The before check showed less than .0002" or two tenths runout. The after check showed . 015" runout or 75 times as much runout.
This meant that the surfaces required machining back to flat. This wasn't a big problem but a head is much more complex than a cylinder. Warpage in a head could include issues with valve guides etc.

That warpage in the cylinder came from making fairly short and small welds quite far away from the gasket surfaces. My thought on welding the head is that it's best avoided, if possible.
The threaded in inserts in al bronze have to be the best solution, but if that's too expensive for you, I have done a bodge with my MK3 steel inserts that came loose. I suppose it could be used with the inserts in your post. Do you have a way of accurately boring the ports for the ready made sleeves?

Glen
 
Has anyone tried using the chromed exhaust nuts whose threads run "larger" and so dig deeper into the head's threads? I have not, but have experience being unable to turn a chromed nut into these threads where the new brass version turned by hand. Risky but thought to put this out there.

Exhaust nut woes
 
There's always risk in doing this fix. If you bore the threads out for an insert you risk boring into porosity and subsequent oil leakage from the exhaust rocker box. I don't know how to check for such porosity before hand but I have run across two heads that suffered from this and had to be junked after the thread inserts were welded in. Leaked through porosity in the welds. Maybe better welds would have helped.

Back in the day there were still spare heads in the shop so we didn't bother repairing the leaks. We warned customers about the possibility of oil leakage and if so it was on their nickel. A head went for $250 and a thread repair for $125 plus labor to R&R the head. Now of course it's different.
 
Luckily i didn't find any longer exhaust nuts around my place! i checked and i can feel that quarter inch of decent thread in the head, so thank you for this idea! i'm gonna try out the longer nuts, wafer seal, pipe sealer, the anti-seize on the good threads, torque with the right tool (instead of my board and hammer), some wire through the fins and nuts, the head's drilled, i'll drill the new nuts and i'll just keep checking that they're tight. i hope this works! thank you for the advice!

someday when i have a proper garage, i'll take the head off, ship it and get it fixed proper with the nice inserts. until then, i'll keep whatever fingers i got left crossed...here's hoping!
i am kinda worried that even that wafer spacer will push me down to like an 8th inch of "good" threads...we'll see
 
Luckily i didn't find any longer exhaust nuts around my place! i checked and i can feel that quarter inch of decent thread in the head, so thank you for this idea! i'm gonna try out the longer nuts, wafer seal, pipe sealer, the anti-seize on the good threads, torque with the right tool (instead of my board and hammer), some wire through the fins and nuts, the head's drilled, i'll drill the new nuts and i'll just keep checking that they're tight. i hope this works! thank you for the advice!

someday when i have a proper garage, i'll take the head off, ship it and get it fixed proper with the nice inserts. until then, i'll keep whatever fingers i got left crossed...here's hoping!
Try putting it together with the seal and no pipes. Snug the nuts. If there is a gap between the seal and the nut you're probably using all the threads. If not, try to get a feel for how much thread you are using. If it feels minimal, I would try sealer, no sealing washers, and no anti-seize then putting it together lightly so the sealer spreads out evenly, and wait however long the instructions say before tightening more. Then start and slowly tighten more. Most likely it won't require heavy tightening due to the sealer. This is just and idea - I've never tried this! I believe it is recoverable if it doesn't work and if it does you're home free.
 
Not to rain on your parade,... but the wafer spacer is the compression gasket that seals your exhaust. If you don't have a seal, then every time you release the throttle, the exhaust will suck air and re-ignite the unburned fuel in your exhaust and go,..."Pop pop pop". So that sealing gasket is necessary unless you can figure out a different way to make a seal. As far as 1/4" of threads holding everything together, I would give it about 10 minutes of riding around before it blows out...... If you combine that 1/4" of thread with some other support, like the beer can strips (hail mary) fix, It might last for a ride or two, but you aren't going to go far because the threat of failure is going to loom over every trip you take. If you do venture out, you should have contingency plan to get home... and that fact feels like crap to have as part of your day.

If I was you, I would find a way to get the correct repair done.... short of that, I would drill tiny holes in the exhaust rose "wings" and I would also drill some tiny holes in the fins of the head, back from the edge of the fin. Then I would make sure I had a roll of lockwire with me when I rode the bike... This way if the rose threads fail, you can use the wire to secure the exhaust rose and pipe for the ride home... As I said above, it will probably pop every time you get out of the throttle because of the exhaust air leak, but you might be able to rig the exhaust in place and ride any thread failure home
 
I've said this before too , many times .
Clean everything .
Smear every contact part(s) in Permatex Copper high heat silicone .
Tighten with proper tool .
Run it , get things hot .
Re-tighten using FORCE , ( sledge hammer , to tool end . ) .
Re-tighten hot again .

If things let go after the final then pull the head and take it into a competent machinist shop for insert .
 
I also had the situation where short exhaust nuts (plus two compression washers each side) had been used by the previous owner. The nuts continuously undid themselves until I realized what was going on. By that time the nuts were very loose in their threads, although not quite stripped. Once I got some longer nuts installed I experimented to see how much new thread I could reach. I was able to secure the headers in with no washers and gain 4+ new threads. I figured that with washers in, there just wasn't going to be enough new thread. So, I went ahead with no washers and cranked on the wrench with herculean force without the threads stripping.
The bike has been running great for 1000+ miles with seemingly no adverse affects and no popping in the exhaust.
However, next winter I intend to put some inserts in.
 
^^^ pretty much like an impact driver does
Not exactly.
when tightening the nut, you exert pressure on one side of the thread, but there is a small air gap at the other side of the thread. Because of that gap, the vibrations of a running engine will unload the thread in fractions of a second and reduce friction to near zero. That's also why a seemingly tight (exhaust) nut can vibrate loose in a short time.
The engine shaking in the isolastics will also take care of any misalignment of the header pipe while tightening the nut.
Sure you can use brute force to get the same result, but at the detriment of the threads in the cyl. head, which are a known weak point.
Try it with running engine, and see how easy the nut turns.
 
Last edited:
Not exactly.
when tightening the nut, you exert pressure on one side of the thread, but there is a small air gap at the other side of the thread. Because of that gap, the vibrations of a running engine will unload the thread in fractions of a second and reduce friction to near zero. That's also why a seemingly tight (exhaust) nut can vibrate loose in a short time.
The engine shaking in the isolastics will also take care of any misalignment of the header pipe while tightening the nut.
Sure you can use brute force to get the same result, but at the detriment of the threads in the cyl. head, which are a known weak point.
Try it with running engine, and see how easy the nut turns.
Ludwig - I'm interested if you use any "compounds" on the threads when installing?
I, just like spark plugs, install them very clean - but completely dry.
Haven't had issues yet - you?
Cheers
 
Ludwig - I'm interested if you use any "compounds" on the threads when installing?
I, just like spark plugs, install them very clean - but completely dry.
Haven't had issues yet - you?
Cheers
On plugs and exhaust nuts a little bit of copper paste.
 
On plugs and exhaust nuts a little bit of copper paste.
Most threads on a Norton need some form of lubrication .
Copper high temp silicone . Exhaust .
Anti seize to assembly thingys .
Copper anti seize to spark plug threads , very little .
 
For the last 45 years I have used PTFE, (plumbers teflon) tape on my exhaust nuts. It is just a matter of getting the correct number of wraps on the threads so that they will just turn in by hand. Even hand tight they will never work loose. No stripped threads and no sitting at traffic lights watching the exhaust nuts unscrew.

ando
I thought this application might be too hot for PTFE tape. What happens to it when it gets hot? And what’s left on the threads when you remove them after use?
 
Quite some decades ago when the roadster suffered worn threads ( and I was skint - again ) I used plumbers hemp and bosswhite, this lasted about two years until I sold the bike.
T’was a bit smelly for a while though !
Hemp goes for up to 200*C
I understand ptfe will do 350*C and comes off easily.
You’ll need to wind on the tape in the correct direction eg clockwise as per the nut.
 
Back
Top