- Joined
- Sep 22, 2015
- Messages
- 831
The bane of all projects right thereBusy weekend with kids activities, so little progress.
The bane of all projects right thereBusy weekend with kids activities, so little progress.
There is supposed to be an axle that works with the fittings in the bag that ride on the top rollers. Is that it at the top of the table?Progress…spokes in, and now I’m testing our different configurations in my new stand. Unfortunately the hub is just a little too small for the tapered “points” to hole the wheel in place. Can anyone chime in if they have faced this problem before?View attachment 101320View attachment 101321
Great advice! I will be bringing this up into l family room for sure!Not sure it can be too small. It's tapered to fit a variety of hubs. Mine fit fine which looks like a similar design
Tusk Motorcycle Wheel Balancing and Truing Stand | Parts & Accessories | Rocky Mountain ATV/MC
Shop for Tools, like Tusk Motorcycle Wheel Balancing and Truing Stand at Rocky Mountain ATV/MC. We have the best prices on dirt bike, atv and motorcycle parts, apparel and accessories and offer excellent customer service.www.rockymountainatvmc.com
BTW, i found it best to true the wheels on the coffee table watching sports and having a beer
Unfortunately the hub is just a little too small for the tapered “points” to hole the wheel in place.


Yes - there is a axle that can go on the top rollers. This stand has both options. The axle is slightly smaller than the hub, but there are “O” rings on the axle to keep it in place.There is supposed to be an axle that works with the fittings in the bag that ride on the top rollers. Is that it at the top of the table?
bingo! Back in business! Thanks!There is supposed to be an axle that works with the fittings in the bag that ride on the top rollers. Is that it at the top of the table?
Yesir! Thanks again LAB!Going by the picture below it looks like the balancing cones (in the bag on your bench) can be added to the truing cones.

BikeMaster Wheel Balancer 30cm X 54cm 800-256 for sale online | eBay
Find many great new & used options and get the best deals for BikeMaster Wheel Balancer 30cm X 54cm 800-256 at the best online prices at eBay! Free shipping for many products!www.ebay.com
Great progress. Looking at the lift/stand photo and I see no securings to the frame . Big cables (zip ties ) would prevent a fall over.Progress…spokes in, and now I’m testing our different configurations in my new stand. Unfortunately the hub is just a little too small for the tapered “points” to hole the wheel in place. Can anyone chime in if they have faced this problem before?View attachment 101320View attachment 101321
Sound advice! I have completely forgotten about securing it. Thanks!Great progress. Looking at the lift/stand photo and I see no securings to the frame . Big cables (zip ties ) would prevent a fall over.
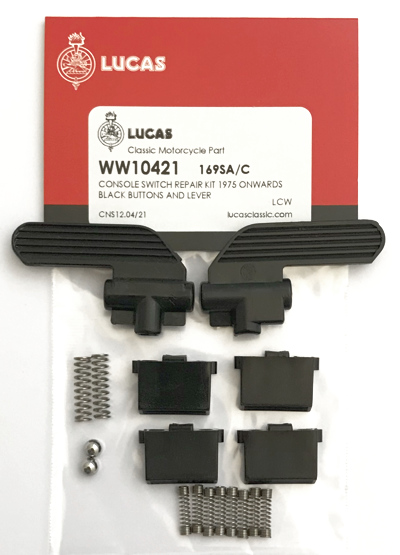
I’m putting my switch gear together, and the new thumb switch has a much shallower hole for the spring.

Good eye! Yes, I would need both. I have an old bag of tricks with switch gear parts, and I clearly do not have my glasses onDo you mean two new levers for the switch clusters because the 3-position (direction indicators) and 2-position dip (Hi-Lo) levers in your picture are not interchangeable?

New seals are in place on the primary cover, and once I replace the pump seal I will mount it.
Hi LAB - here is an enlarged picture so it might be easier to see if I have the seals facing the right direction. They are both facing the same direction. Very high probability I have this wrong, as I did not take a picture of which way the seals were facing prior to removal. Surprisingly enough, I did remember the circlip after I took the picture!Timing cover? I can't be sure (as it's a low-res picture) but is the crank seal fitted correctly with the garter spring side away from the crankcase so facing the opposite direction to the camshaft seal? No circlip?
Also, the headlamp brackets are fitted on the wrong sides (and thus inverted). Fitted correctly the adjustment slots will be horizontal.
I 100% agree. I have too many hours put into these wheels to risk butchering them up mounting a tire!Looks good. From personal experience I recommend having a local motorcycle shop put on the tires
Yes, the crank seal (2) is facing the wrong direction because the oil flows from the timing cover to the crankshaft so the 'pressure' (lip with garter spring) side faces the timing cover gallery (factory manual, section C26).They are both facing the same direction. Very high probability I have this wrong,
Thanks for the save!! I would have completely missed this!Yes, the crank seal (2) is facing the wrong direction because the oil flows from the timing cover to the crankshaft so the 'pressure' (lip with garter spring) side faces the timing cover gallery (factory manual, section C26).
