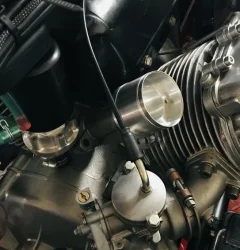
TW wrecks a perfectly good Commando etc.

Not sure how 14 mm centres/centers became 8 mm centres.
Out with the old and in with the new.
A late night fix, on with the Bose NC headphones (Thanks Qantas for two sets) up goes the 'Slade and knock another one out in record time.
That will learn me.
One for the Commando, one in the scrap bin for another day.

I ordered some Titanium bar for the shafts, one for the pivot, one for the pull rods.

TW wrecks a perfectly good Commando etc.
 
I'm not sure a Boyer sensor plate would like to be immersed in oil. (Dry area on a two stroke)
#
It would be a very easy modification to do. ( A machined spider for the pick up/sensor with inner vernier adjustment plate and a trigger rotor)

I have to admit my enthusiasm was soon lowered and thought the vender might have been somewhat interested but it was not to be. (It was more like a 'I rang to say the cat died phone call ) = lol
I will look at buying a sensor anyway if I can and do the mod later on.

I had converted my 1973 Moto Guzzi to a Hall Effect distributor.
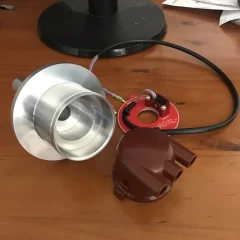
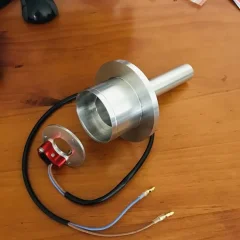
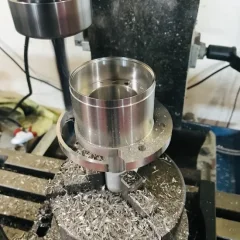
Machine the distributor body ID.
Machined a sensor carrier and trigger.
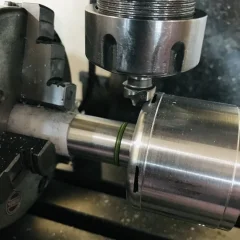
Machine the shaft and shim the end float.
New Bosch TCI coil and VW ignition module.

To easy and another enjoyable project.

Stay hungry or become old very quickly.
There does not always have to be a reason to do things.

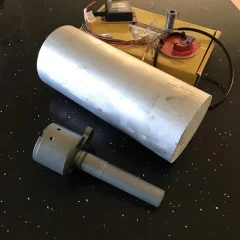
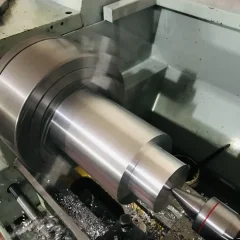
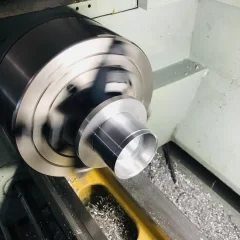
View attachment 85489 View attachment 85493 View attachment 85490
View attachment 85492 View attachment 85491
A mate of mine bought a fuel injected guzzi from a scrap yard
It had complete electronic breakdown
He removed the injectors and fitted 40mm mikunis
And the ignition was from a BMW boxer
He bolted the complete bean can on the front of the motor with the internals modified for the guzzi firing order
 
2 mm radius on the bearing pedestals.
You can set the tool but a Sharpie is a good back up, the mark will show when you are close to the limit of the radius.

TW wrecks a perfectly good Commando etc. TW wrecks a perfectly good Commando etc. TW wrecks a perfectly good Commando etc. TW wrecks a perfectly good Commando etc. TW wrecks a perfectly good Commando etc.
 
The top plate (black with one linear bearing) sandwiches to the lower (red with one linear bearing ) unit and fixes at the four 2BA screw locations at the top of the Amal's
The red unit sits in between the two carburetors.
A throttle cable drum with Crotch crank raises and lowers the ground rod doing the same for the top yoke which does the same for the slides.
There would be basically no 'junk on top of the carburetors, just the yolk and its pull rods.

View attachment 85315
Hi Time Warp, why not take a really inventive step and build a ride-by-wire device, i.e., an electric throttle actuator?
Your sketch lends itself to the idea.

- Knut
 
Last edited:
Hi Time Warp, why not take a really inventive step and build a ride-by-wire device, i.e., an electric throttle actuator?
Your sketch lends itself to the idea.

- Knut

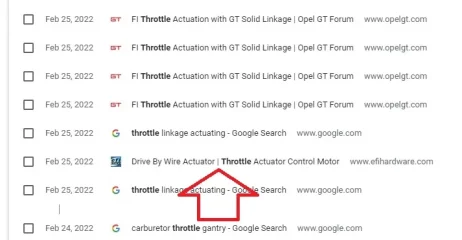
Google search history Feb 25th. :)

TW wrecks a perfectly good Commando etc.
 
So you have considered it! The "efihardware" actuators are for large car engines and far too bulky for m/c use.
This linear actuator placed between the carbs should work far better:
Amazon product ASIN B076PYYPTM
- Knut
 
First job today is get the inlet manifolds so the carburetors are at the same height and level at the tops.
The manifolds as stock have the holes and studs skewed to each other which is not a problem with twin throttle cables but can present a problem (unless ignored) with a top gantry plate.

View attachment 85151 View attachment 85165

Hi TW, I have yet to fit the Madass gantry and I am a little worried the carbs will be out of alignment. There is not only differential height to consider, but possibly a deviation in forward / aft position due to manifold differences. The latter happens if a line between centers of manifold inlets isn't parallel to the outlet. Apart from the fly cut providing equal height, how do you ascertain the centers are aligned?

- Knut
 
Last edited:
Hi TW, I have yet to fit the Madass gantry and I am a little worried the carbs will be out of alignment. There is not only differential height to consider, but possibly a deviation in forward / aft position due to manifold differences. The latter happens if line between centers of manifold inlets isn't parallel to the outlet. Apart from the fly cut providing equal height, how to you ascertain the centers are aligned?

- Knut

Hello Knut

I have one of those gantries that has been in pieces for some time (but will not make a comment on it but had bought it to save the time making one and will on sell it later cheap)

The short version is the fly cutting sets the forward and aft, the inserts set the level and height.

The inlet manifolds although the same (because they are but the studs were twisted compared to the holes) were mounted on a machined plate with the studs into locating holes so both are inline. (From the machine vice to the adjustable angle plate)
The cylinder head side holes were then as per the drawing below, I considered simply using a cutter to make new holes (slots) at the 2" centres.
Instead I used both 10 mm and 11 mm cutters to make stepped (now offset to the original's, one up, one down) holes and stepped inserts (interference fit on both with Loctite 680 and needed a small tool to pull them in)
They had a small amount of stick out which was removed when the manifold faces were fly cut together.
The manifolds are now the same and the carburetor faces inline.
Any discrepancy is now at the new Premier carburetors.

std.jpg


Once that was done, the angle plate was used (with the Premiers mounted) to bring the clocked carburetors vertical based off their top faces.
The two main bores and four 2BA holes were then plotted with the Ditron DRO.
The gantry plate is machined to those plots, no oversize holes, no forcing anything.

It occurred to me now the plate I drilled wrong (Post #281) can be machined down to the minimum size (2BA positions) and thinned to 6 mm to become an alignment plate for carburetor fitting. (Instead of going in the scrap bin)
Building a stock Commando takes some time.
 
Last edited:
I will log this project and then call it quits for a bit due to recent developments with the western border opening.
Hopefully the titanium rod will turn up next week to complete it.

TW wrecks a perfectly good Commando etc.
 
Last edited:
Not bad at under two weeks from the UK standard Airmail.


111.jpg
 
Over this way or going home?

About 1300 kms north of Perth.

I can't see New Zealand happening for a long time thanks to the flood of Covid since the borders opened so still no family for well over two years now. My last Uncle died last month but could not get to the funeral.
I am seeing first hand daily the lingering respiratory infection of 'recovered people who now test negative. (all ages)
Sorry to hear that, mate.

People at work are all keen to get over here/there. My boss and one of my peers went over there last week. I am happy to work in my little home office and only go in once a week. Kinda lonely sometimes, but better than the probable alternatives.
 
Sorry to hear that, mate.

Its just the way so maybe later in the year.

Just got off the phone with Stephen Kelly regarding my next project using a new release Compass ignition kit.
It arrived very quickly (24 hour free post to my door)

It is for a latter twin points bike which has a larger OD housing and that housing will not fit this bike having a top mounted generator which it would hit.
All it needs is a custom distributor 7 mm bigger ID than the stock single point item, a new sensor mounting plate and customised shaft to suit the Tri-Spark trigger along with the stock distributor cap (with stepped reducer ring) so it looks stock on the outside.
How hard could that be.

3.jpg


rr.jpg rruu.jpg tsd2.jpg tsd4.jpg
tsd8.jpg tsd9.jpg TW wrecks a perfectly good Commando etc. 1.jpg

Finished and ready for final assembly.

tsd000.jpg
 
Last edited:
Back
Top