Sprocket Alignment

Thanks Rob (and others), i've just had a sit on the bike and reaching down there is almost no chain slack with my weight on the seat. I've noticed the preload is on minimum too so will make sure we do it all correctly when recommissioning.
The bright inside face on the sprocket also l also seems to have been result of wear, near the hub it is still black - something must have gotten wedged in there while on the move. Ouch.
 
Giving things the once over and the rear sprocket is a mess, severe wear on the outside face and an impressive amount of shavings gooped up under the alloy front sprocket cover. The rear sprocket has black face out/bright face to the wheel which seems correct and the front sprocket looks correct.Would appreciate any thoughts on what is out of alignment?
One other small query, when removing the clutch slave cylinder the cap screws pass through the slave cylinder then through a washer/spacer, then into the alloy cover. Are the washers normally there?
View attachment 6294 View attachment 6296 View attachment 6295
Recently discovered the rear sprocket on my 2015 961 SE is similar, but the wear is on the inside. Anyone know of a US source for the Talon 50 tooth stock sprocket, or the 47 tooth option discussed on another thread? Or any source for that matter that beats the 6 weeks quoted by AFI?
 
Harwood Performance Source UK or Buy from Norton Motorcycles UK for a few dollars more. I had my polished 50T in less than a week from Norton. Harwood will only stock up to 47T any larger and you will be waiting longer. I say buy from Norton. As far as a US source , I had found two different sources in US. BUT , the price was more for the sprockets. Even with UK shipping , the USA sources more money. HPS was the best price I could find at that time . And they were very helpful !
 
Last edited:
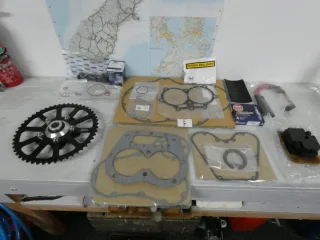
Well Christmas must be close, the presents have started arriving.
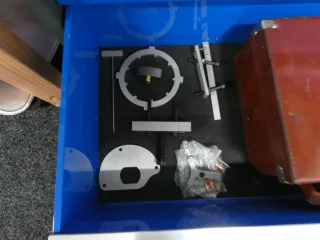
cNw/Richard7 tools and upgrades are here, plus an array of gaskets, o-rings, cush rubbers etc from Norton - good service from both Brisbane MC/Norton and, of course, cNw.
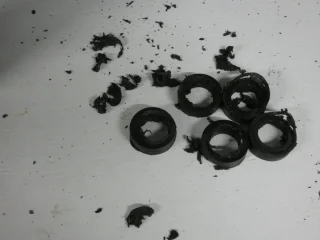
Original cush rubbers are toast - i see earlier posts about the replacement rubbers being somewhat better. Here's hoping.
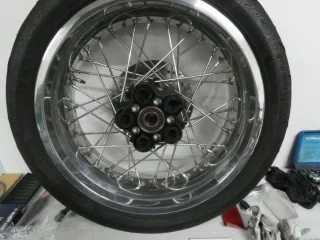
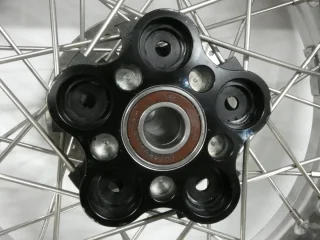
5th pic - the hub is bruised from contact with the sprocket carrier studs. I see TonyA just did some panel beating there, will try that.
I was only expecting a new sprocket but it came with a new carrier as well. The studs which the cush rubbers slip on to are only 10mm deep on the new carrier vs 13mm on the old. The recess in the hub is 10mm, so the new studs presumably avoid the bruising issue if the rubbers fail?
Of most interest though, there is a centre spacer on the hub side of the new carrier - this fouls on the bearing in the hub. Is this carrier for the carbon wheel or have there been other changes in set up over time?

Sprocket Alignment Sprocket Alignment Sprocket Alignment Sprocket Alignment Sprocket Alignment Sprocket Alignment Sprocket Alignment Sprocket Alignment
 
Well Christmas must be close, the presents have started arriving.
cNw/Richard7 tools and upgrades are here, plus an array of gaskets, o-rings, cush rubbers etc from Norton - good service from both Brisbane MC/Norton and, of course, cNw.
Original cush rubbers are toast - i see earlier posts about the replacement rubbers being somewhat better. Here's hoping.
5th pic - the hub is bruised from contact with the sprocket carrier studs. I see TonyA just did some panel beating there, will try that.
I was only expecting a new sprocket but it came with a new carrier as well. The studs which the cush rubbers slip on to are only 10mm deep on the new carrier vs 13mm on the old. The recess in the hub is 10mm, so the new studs presumably avoid the bruising issue if the rubbers fail?
Of most interest though, there is a centre spacer on the hub side of the new carrier - this fouls on the bearing in the hub. Is this carrier for the carbon wheel or have there been other changes in set up over time?

View attachment 7272 View attachment 7273 View attachment 7274 View attachment 7275 View attachment 7276 View attachment 7277 View attachment 7278 View attachment 7279

This is question for Rob at Norton. And yes , if your cush rubbers are the originals , then yes new ones are not as soft. Is the distance piece removeable from the new carrier and swap in the original in its place ? Close up pictures of the two carriers would be helpful to see better. But clearly the wide distance piece seems wrong to me. Your cush rubbers will never engage the 5 holes in the hub properly with the long distance piece. The assembly may not even fit in the swingarm. After looking at the service manual drawings the carbon wheel looks to have a wider distance piece between the sprocket carrier and hub.
 
Last edited:
Hi Tony,
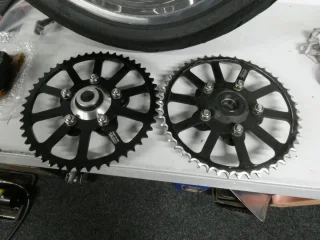
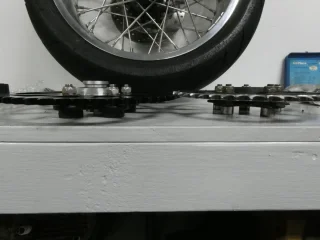
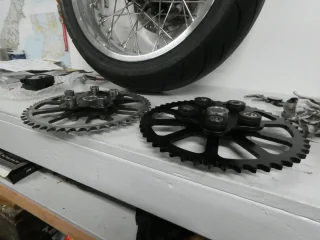
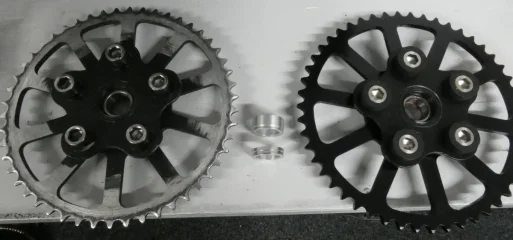
Looks like the difference is in the spacers, i hadn't noticed the narrow spacer in the original carrier as it sits flush with the back face of the carrier.
Both now removed and sitting between the sprockets below, they seem to be interchangeable.
Sprocket Alignment
 
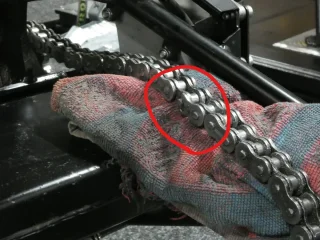
I started to clean the chain up and see whether it was still usable, but one more item for the shopping list.
Sprocket Alignment
 
I started to clean the chain up and see whether it was still usable, but one more item for the shopping list.
View attachment 7284

WOW ! I didn't see that broken link. If that's a Regina they may send you a replacement at no cost . Send Regina a picture of your chain and offer to send it to them for analysis . They may even offer you a call tag so shipping is covered !
 
It is a Regina, although given the hiding the rear sprocket has had i am not sure i could have a go at the chain supplier.
Britfan60 - the plan is to give the engine a once over, just in case. It was privately imported to NZ and well out of warranty anyway.
 
I'm not sure why a replacement cush drive has been sent!
As far as I remember, all you need to do is swap the inside spacer from your old cush drive. The new bikes have a revised design on the rear hub where the drive side bearing in the hub is recessed slightly and held by a circlip, which is why a larger spacer is needed.
 
Hi Rob , That sounds like a great upgrade. It requires the replacement of our spoked wheel hubs though ? Is there any new change to the cush drive ? like the shorter bolts etc. Should any of these improvements be used on our older machines ?
 
Rear end now back together and fitting nicely, Grimeca clutch slave now sitting snug on the modified drive sprocket cover, crankcase breather kit fitted, starter solenoid kit ready to fit, new chain booked for Friday - so i may even have a test ride soon.
Quite some fun refitting the rear wheel solo - brake bracket and 2 spacers to keep track of while lifting all into place. Especially fun to find that once all was finally together i had transposed the two external spacers somewhere during the juggling act, so pull all apart and have another go. All good practice as they say.
Chain Monkey tensioner and laser alignment light seem to be effective although simplest to use if the chainguard is first removed.
 
Hi Rob , That sounds like a great upgrade. It requires the replacement of our spoked wheel hubs though ? Is there any new change to the cush drive ? like the shorter bolts etc. Should any of these improvements be used on our older machines ?

Hi Tony,

You would need to replace the hub to get to the latest revision.
Like all manufacturers, we constantly change things to improve the bikes, which I expect (and hope) you guys will see is evident throughout production.
There will be a new revision of the cush drive in the not too distant future.

My advise would be that if you want to change it, it is compatible with the older bikes, so there isn't any reason why not, but clearly it would be up to you to decide if the cost/reward suits your needs/wants.

Rob
 
Rear end now back together and fitting nicely, Grimeca clutch slave now sitting snug on the modified drive sprocket cover, crankcase breather kit fitted, starter solenoid kit ready to fit, new chain booked for Friday - so i may even have a test ride soon.
Quite some fun refitting the rear wheel solo - brake bracket and 2 spacers to keep track of while lifting all into place. Especially fun to find that once all was finally together i had transposed the two external spacers somewhere during the juggling act, so pull all apart and have another go. All good practice as they say.
Chain Monkey tensioner and laser alignment light seem to be effective although simplest to use if the chainguard is first removed.

Little tip for replacing a rear wheel by yourself:

  1. Insert the spindle in to the swingarm just enough so it will pick up the caliper carrier, but not enough so it protrudes through the hole
  2. Roll the wheel in from the left hand side of the number plate bracket, with sprocket and all spacers attached, while holding the chain up
  3. Feed the chain on to the sprocket
  4. Use your dominant foot to wedge under the tyre and between the floor, raising and lowering the height. This frees up your hands to make sure the spacers don't fall out.
  5. Once you are about lined up, the spacers are wedged between the arms of the swingarm, start to move the spindle in a circular motion while pushing in to the hub
  6. Now you have the spindle started in the hub, knock the spindle through with the palm of your hand, taking care to ensure that the chain adjuster on the right hand side is lined up before the final push.
When well practised, this process can be done in less than a minute.

It does help if you back off your chain adjusters as far as you can.
 
Back
Top