- Joined
- Feb 26, 2022
- Messages
- 92
Hi all,
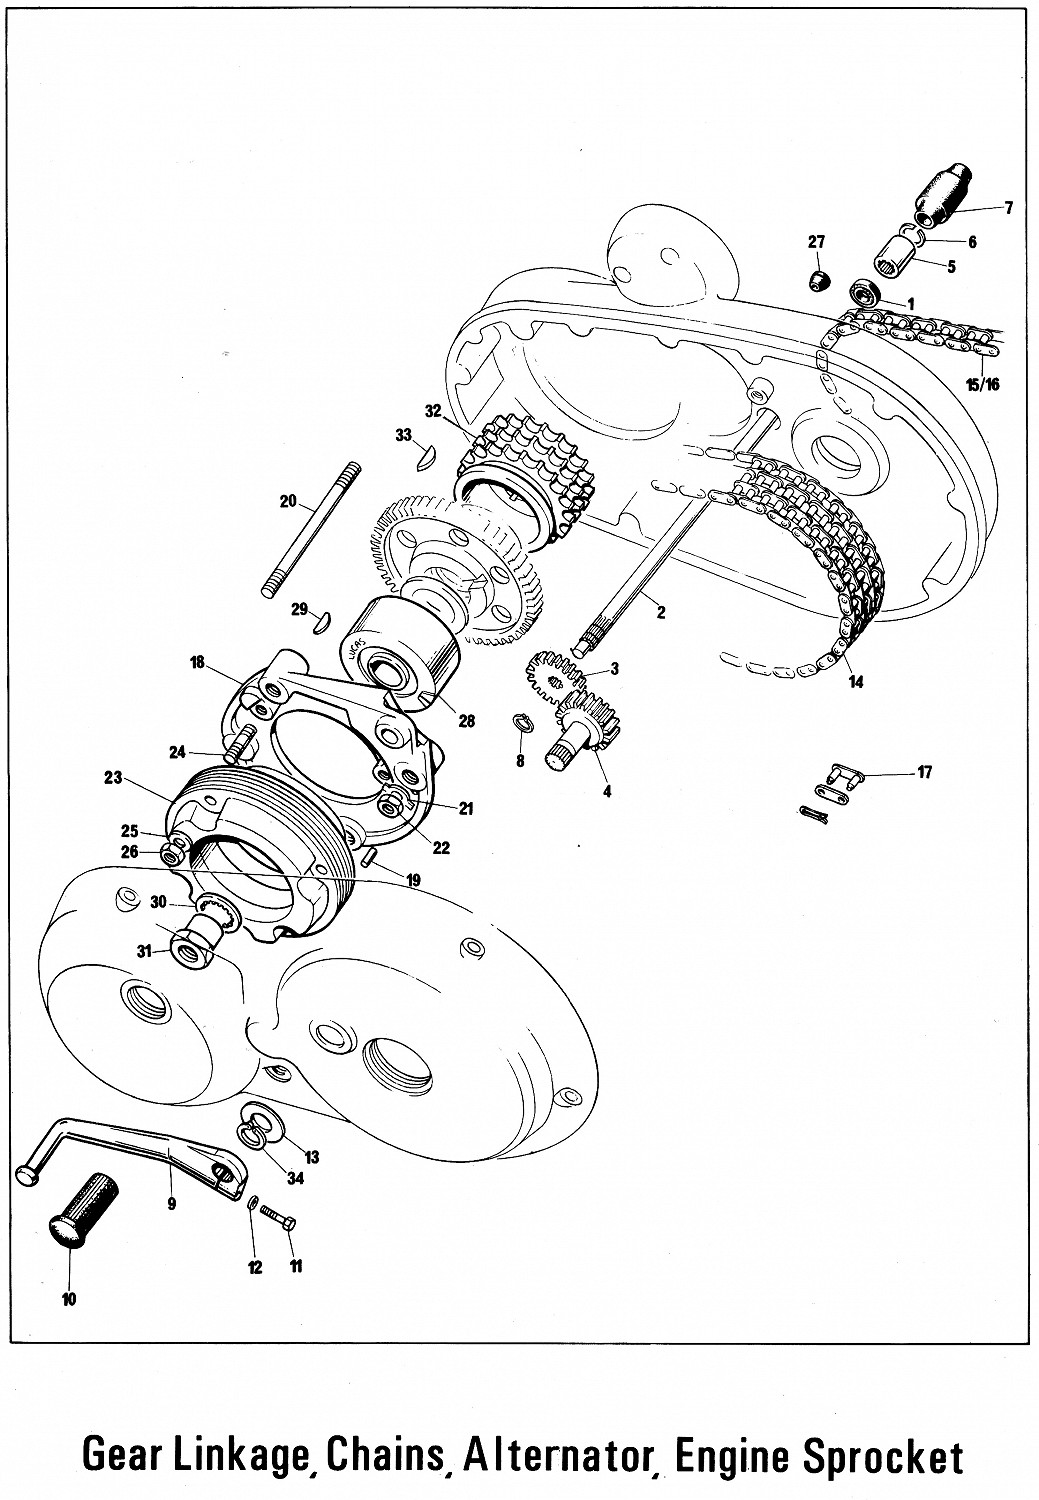
I'm running into a problem that seems fairly common on Commandos. My 3 phase stator/rotor upgrade has lead to a clearance issue between the two when mounted. So far fettling has not effectively resolved the issue. I can get it down to ALMOST a smooth .08mm clearance at the tightest spot, but the difference in gap from one side to the other is huge, and I have burned through one stator hoping what I got to previously was close enough. So I really want to make sure I do it right this time. The zone where it's tightest seems somewhat endemic to commandos:

I've done a lot of digging into suggestions for fixes, which have included:
the milk plastic shim method
bending the studs
hammering the stator
reaming bigger stud holes in the stator
grinding down the studs
removing material from the carrier on the right side where it closely follows the OD of the stator
milling down the OD of the rotor
...The list is long. But there doesn't seem to be a very clear consensus on best practices. My loosened assembly doesn't seem to have enough wiggle room for shims to work, and I don't understand how hammering or bending studs is going to move a part that is captured pretty tightly by the carrier plate (and the carrier plate in turn by the inner primary cover). Drilling bigger holes in the stator / grinding down the studs / modifying the carrier plate seem like they might potentially accommodate more movement, but what's the risk of stuff vibrating back into an interference condition? Milling down the rotor would be an interesting option if I had the setup to properly do that, but then the already large clearances on the left get even larger.
I'd appreciate any wisdom here because I'm a bit stumped as to the best fix for the problem.
Thanks,
Anthony
I'm running into a problem that seems fairly common on Commandos. My 3 phase stator/rotor upgrade has lead to a clearance issue between the two when mounted. So far fettling has not effectively resolved the issue. I can get it down to ALMOST a smooth .08mm clearance at the tightest spot, but the difference in gap from one side to the other is huge, and I have burned through one stator hoping what I got to previously was close enough. So I really want to make sure I do it right this time. The zone where it's tightest seems somewhat endemic to commandos:
I've done a lot of digging into suggestions for fixes, which have included:
the milk plastic shim method
bending the studs
hammering the stator
reaming bigger stud holes in the stator
grinding down the studs
removing material from the carrier on the right side where it closely follows the OD of the stator
milling down the OD of the rotor
...The list is long. But there doesn't seem to be a very clear consensus on best practices. My loosened assembly doesn't seem to have enough wiggle room for shims to work, and I don't understand how hammering or bending studs is going to move a part that is captured pretty tightly by the carrier plate (and the carrier plate in turn by the inner primary cover). Drilling bigger holes in the stator / grinding down the studs / modifying the carrier plate seem like they might potentially accommodate more movement, but what's the risk of stuff vibrating back into an interference condition? Milling down the rotor would be an interesting option if I had the setup to properly do that, but then the already large clearances on the left get even larger.
I'd appreciate any wisdom here because I'm a bit stumped as to the best fix for the problem.
Thanks,
Anthony