Richard Tool
VIP MEMBER
- Joined
- Aug 3, 2019
- Messages
- 1,770
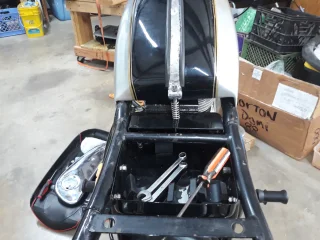
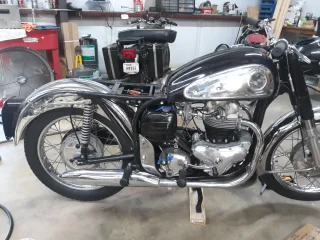
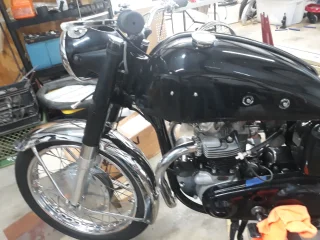
Hi all - new thread here for new project. I bought this Wideline Dommie approximately 15 years ago when money and enthusiasm were more abundant. I have decided to chip away at it . I am largely retired now with a limited income - while money and enthusiasm are not what they used to be,
time is more available. I drove 9 hours to get it and only then did I discover, among other things , several broken fins on the cylinders. I bought it regardless as it had a clear title and I had come a long way .
My interest has returned a bit thanks to a tip from Access Norton member
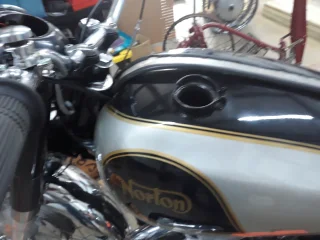
t ingermanson who alerted me to a set of barrels on eBay UK . Cylinders for dynamo Dominators are rare and so I placed bid and won . They are en route to me now so I’ve begun to explore what I have and what I may need . I haven’t really looked it over for several years but I am at least doing that
much . My plan is to get a loosely assembled rolling chassis in epoxy primer first then explore the engine / gearbox internals .
This is likely to be a slow and spotty effort as money becomes available but it’s a start.


Thanks for looking in .
RT
time is more available. I drove 9 hours to get it and only then did I discover, among other things , several broken fins on the cylinders. I bought it regardless as it had a clear title and I had come a long way .
My interest has returned a bit thanks to a tip from Access Norton member
t ingermanson who alerted me to a set of barrels on eBay UK . Cylinders for dynamo Dominators are rare and so I placed bid and won . They are en route to me now so I’ve begun to explore what I have and what I may need . I haven’t really looked it over for several years but I am at least doing that
much . My plan is to get a loosely assembled rolling chassis in epoxy primer first then explore the engine / gearbox internals .
This is likely to be a slow and spotty effort as money becomes available but it’s a start.
Thanks for looking in .
RT