Words of wisdom, checking head torque on Mark III engine

Status
Not open for further replies.
Yeah , me too. 4 Nortons later and never stripped anything. Ever. Plus never had a head gasket failure , ever. Go by feel young Luke. Feel the force.
Yep I've never had a problem with a cylinder head
I do make sure I re tighten the bolts several times during running in/heat cycles
 
If you learn to get a ‘feel’ for tightness, your wrist can be more accurate than a torque wrench in difficult to access situations.
This^
Does anyone still use hammers? That's how I learned to tighten the underside head nuts and base nuts.

When Ron Wood was asked what the difference was when he retired the Norton and got an XR Harley, he said, "I never owned an 1 1/4" socket before in my life and I had to get bigger hammers."
 
I bought my first norton in the spring of 1966 at Dehaven's Cycle Shop in Winchester Va. Still have the bike, anyway I was at his shop one day and he was putting the head back on an Atlas and while I was watching him tighten the head bolts I asked where his torque wrench was and with a snappy reply, he said I don't own a torque wrench I know how tight to tighten the bolts and I have worked on hundreds of bikes without any problems. So, there is truth in hand torquing if you know what you are doing. I myself have done quite a few head installs. I use a torque wrench for the top bolts and nuts but use the old hand torque for the bottom ones and have had no problems. I think experience in turning wrenches for many years comes in very handy with torquing the upside-down nuts on a norton head or any other work.
 
If you want to teach or re-check yourself on hand torque, you can use a calibrated torque wrench but put your hand the distance away from the socket as it would be on the wrench or ratchet. I do this once in a while since as I get older and weaker, I feel like I'm pulling as hard as I once was, but now need to feel like I'm pulling even harder to get the torque right.

IMHO, except the two front studs/nuts, getting all tightened in the right order and the same is more important than the actual torque.
 
Hi all,
A little practice in tightening bolts by hand then checking with a torque wrench soon develops a pretty good feel for how much torque you are applying.
I try to visualise what 20’lb is in my head (for example). It’s surprising how accurate you can get.
Of course I always use a torque wrench when I can but on occasions it’s just not that practical.
It would be easy to get very hung up on exact torque settings when in reality we know it is a rather poor method of measuring a load on a fastener. So many variables such as lubrication, thread condition etc conspire to make it inaccurate, hence crush washers and angle gauge meters are probably far superior but for our rather primitive bikes I’m sure a reasonable approximation is ok
Regards
Alan
 
Head bolts checked and Norton is back together. I printed a diagram with sequence of operations and torque settings for each bolt (thank you to the person who posted this!) and followed it carefully. I checked one bolt with both torque wrenches, they were identical. All bolts were less than a quarter turn from torque setting, so I did not check valves (planning to ride bike another 200 miles or so, change oil, check valves and re-check head bolts) except for the lower left sleeve nut, which was only hand tight. I was able to get the torque wrench on six bolts, I used a hand wrench on the remaining three, trying to match the amount of pressure on the torque wrench.

Started bike up, sounds good, no leaks.
Thank you to all for help and suggestions
It is very possible my tappets were on the tight side to start with, but when I re-torqued my head, also about 1/4 turn, my LH exhaust valve had no gap and the other 3 were too close.
 
Checking clearance is way easy on these old bikes, esp compared to my modern Bonneville. That entails removing tank, one piece valve cover and $80 special sealing rubber gasket meant for single use. After determining clearances, god forbid you've got one or more out of spec b/c then you need to remove the cams, remove the offending shim plate to measure its thickness, to a calculation to determine what thickness shim to buy, place your order to Triumph and wait 7 to 10 day for order to arrive before proceeding to Put it all back together. Dealer will charge you over $500 for this service.
 
Yup, it is a great tool if you do not have the nerve to "free-hand" torque the three underside nuts not reachable by a socket torque wrench directly. Comnoz has video's showing how easy it is to strip those head studs at not much over the spec'd torque.


View attachment 100752


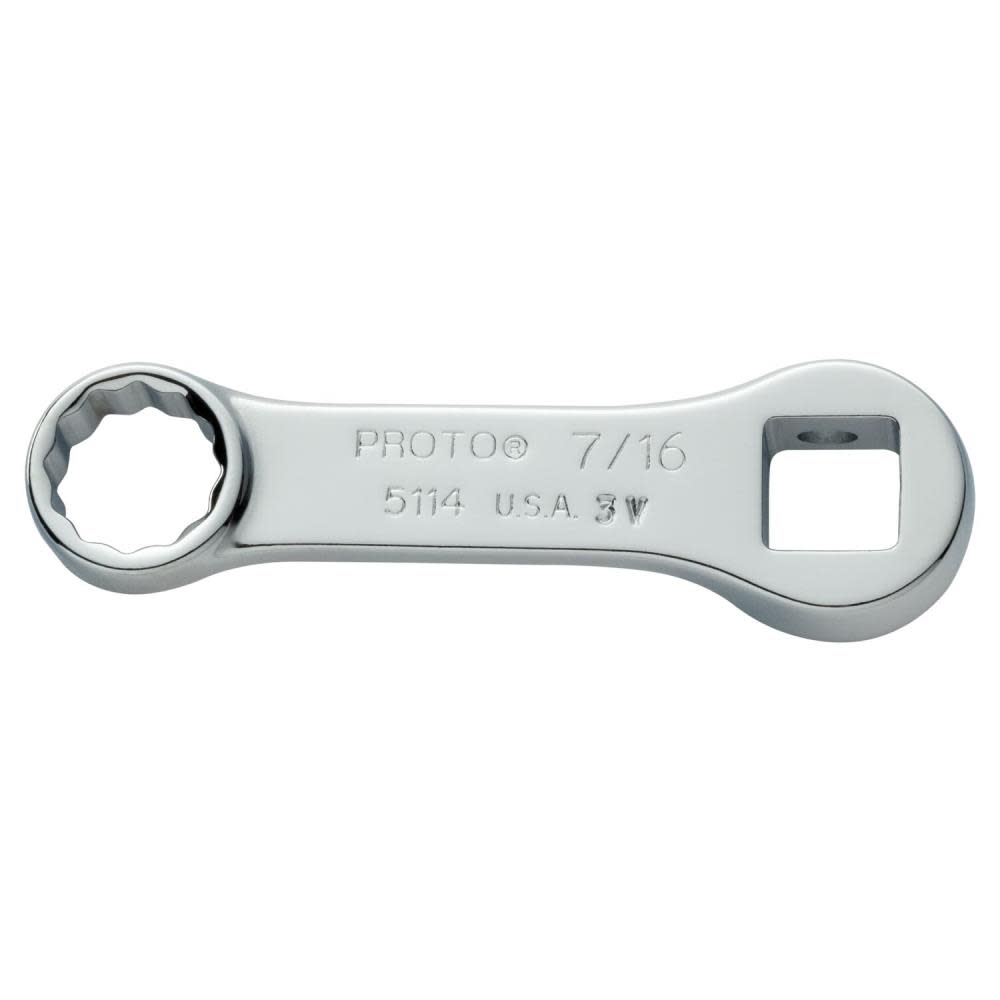
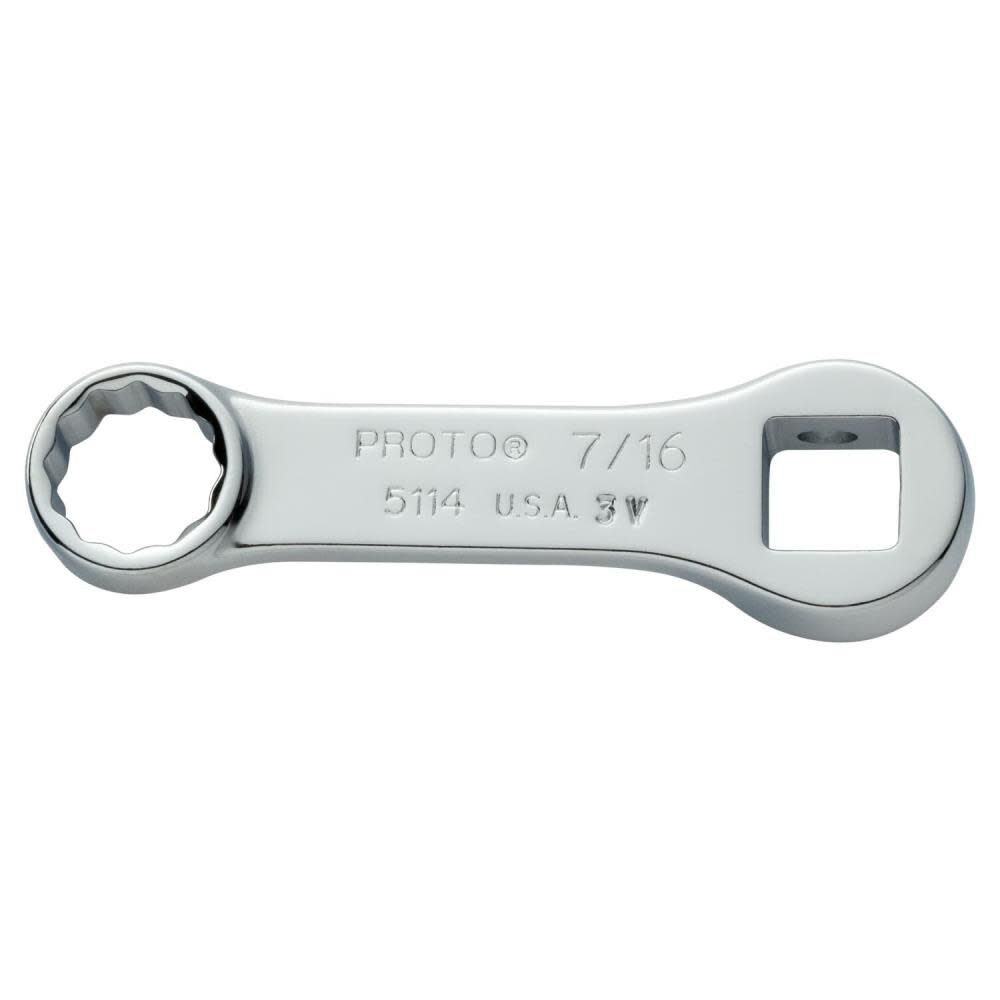
Haven't tried it but one of these should work as well:

Words of wisdom, checking head torque on Mark III engine


Yikes.
The statement that when the wrench is perpendicular to the torque wrench is patently false.
That statement made, the difference may fall within the acceptable + or - of engineered torque values.
When calculating torque, the only meaningful measurement is from the point of pressure (your hand) to the axis of the fastener being torqued- torque wrenches by design take that distance and move it to the head of the wrench, so it matters little where you pull on the handle. So the distance between the torque wrench head and the fastener becomes the meaningful distance, and the bone wrench shown below actually comes with instructions on how to compute the torque value difference when used inline or at 90*. When you slide the Motion Pro device nearer or farther from the fastener axis you are changing the effective lever. How much difference it makes depends on a lot of factors, but if I was to use it on something that was torque-to-yield or marginal failure matrices like Norton head studs.
Well, you seem to be implying there is something special about the length of the fixed adaptor (proto) versus an adjustable adaptor (MotionPro).

The calculation for various angles to the adaptor are here:

Words of wisdom, checking head torque on Mark III engine


If held at 90 degrees, then "C" becomes zero and the change in torque setting becomes nil. There is no factor for distance from the wrench pivot point to fastner center.
 
Thanks folks for pointing out that I needed to check the valves. I did that today. They were all tight and I loosened them to spec per manual. However, you are WRONG when you told me "it won't take very much time." It took me three hours from starting to take the bike apart to finishing putting it back together. Newbie amateur mechanic.
 
Thanks folks for pointing out that I needed to check the valves. I did that today. They were all tight and I loosened them to spec per manual. However, you are WRONG when you told me "it won't take very much time." It took me three hours from starting to take the bike apart to finishing putting it back together. Newbie amateur mechanic.
well, not compared to changing the rear isolastics, that is!
 
  • Like
Reactions: baz
Good stuff. Thanks for posting it.
Now, just need to source a properly calibrated luggage scale.
A similar topic over on General MC forum and luggage scale accuracy came up. I did a little research and posted this:

Got me curious to research how good are typical luggage/fish digital scales. Came across this blurb on a low cost scale which tested out as about 0.1-0.5% accuracy.

https://www.bassresource.com/bass-f...36-luggage-scale-digital-scale-1-year-report/

Here's the scale tested...less than a ten'r!

www.ebay.com

Portable Electronic Hanging Fishing Digital Pocket Weight Hook Scale 40kg/10g | eBay

www.ebay.com
 
Status
Not open for further replies.
Back
Top