Head Removal

Head removal and refitting is a bit like love making
It's a bit awkward and fiddly at first but you soon get the hang of it
It's better with a partner but you can do it by yourself! 😁😂😂😂😂
And if it's a pain in the arse you're probably doing it wrong! ;)
 
And if it's a pain in the arse you're probably doing it wrong! ;)
Yeah, maybe I have been lucky but I have never had an issue that has caused me to genuflect when refitting the head. I did it the first time following the shop manual 20 years ago and has been good like that every time. Knock wood.

I probably just jinxed it.
 
Finally getting ready to install head. New copper head gasket recently arrived. I’ll be annealing as per supplier’s recommendation but on inspection I noticed an almost imperceptible ridge on the edge of the gasket and around the various holes on the gasket. Barely noticeable when finger nail is dragged over edge. Not sure if gasket is pressed from sheet copper or cut. I’ve removed and reinstalled the head many years ago using the methodology in the Owners Manual without any problems but haven’t done so for 40+ years. My question is should I even bother sanding the edge of the gasket. I’m thinking a very light sanding with 2000 or even 4000 grit paper, or would I be creating another issue by doing so.
 
Not sure if this was previously covered, but be sure to check carefully for the common issue of the two top front barrel stud holes having hairline cracks into pushrod tunnels. Need to unthread the studs and shine a light down the holes while looking in tunnels for light coming through. These are a likely cause of oil seep up past the studs and then down front of engine, usually thought to be a leaking rocker cover or head gasket. I'm sure mine is doing this now...abated it for a little while with high temp silicone under the head nuts/washers there but proper fix is to locktite those studs in the holes, sealing the threads off.
 
Finally getting ready to install head. New copper head gasket recently arrived. I’ll be annealing as per supplier’s recommendation but on inspection I noticed an almost imperceptible ridge on the edge of the gasket and around the various holes on the gasket. Barely noticeable when finger nail is dragged over edge. Not sure if gasket is pressed from sheet copper or cut. I’ve removed and reinstalled the head many years ago using the methodology in the Owners Manual without any problems but haven’t done so for 40+ years. My question is should I even bother sanding the edge of the gasket. I’m thinking a very light sanding with 2000 or even 4000 grit paper, or would I be creating another issue by doing so.
Personally, I would leave it. Reason being is that when you anneal you are softening the copper (after having been work hardened in manufacturing) and the ridge should compress and seal. This is similar to how JS adds a thin copper wire around the push rod tunnels to seal better.
 
Head on and torqued as per method in Workshop Manual. Hardest part was getting the washers and nuts down in the two tunnels under the exhaust rockers. My question now relates to the routing of the rocker oil feed line between the timing side and drive side of the head. My bike has always had the line pass in front of the head but I have seen photos of some bikes where the line goes around the back of the head. I think Old Britts showed the line around the back in one of their technical articles. Is there any technical reason why one route is preferred over the other? Or is it simply personal preference? There may be some cooling effect from having the line pass in front of the head but I'm not sure if it would be significant.
 
I use a long rod for the washers. Hold the washer up high, touch the rod to the stud then let the washer drop.
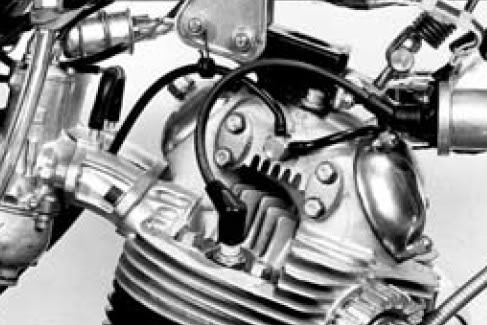
Line in the back of the cylinder. That’s a first. Not seen anyone run it up the front. For the original plastic line there is a wire hook attached one of the head steady bolts that keeps the line away from hot parts. The rubber grommet that comes with the original line goes into that wire hook. You
can see the grommet and wire hook in this from Andover Norton.
Head Removal
 
Last edited:
My bike has always had the line pass in front of the head...

The crossover section? Yes.

...but I have seen photos of some bikes where the line goes around the back of the head. I think Old Britts showed the line around the back in one of their technical articles.

Brochures, manual diagrams, etc. show the crossover ahead of the steady.
Head Removal
Head Removal

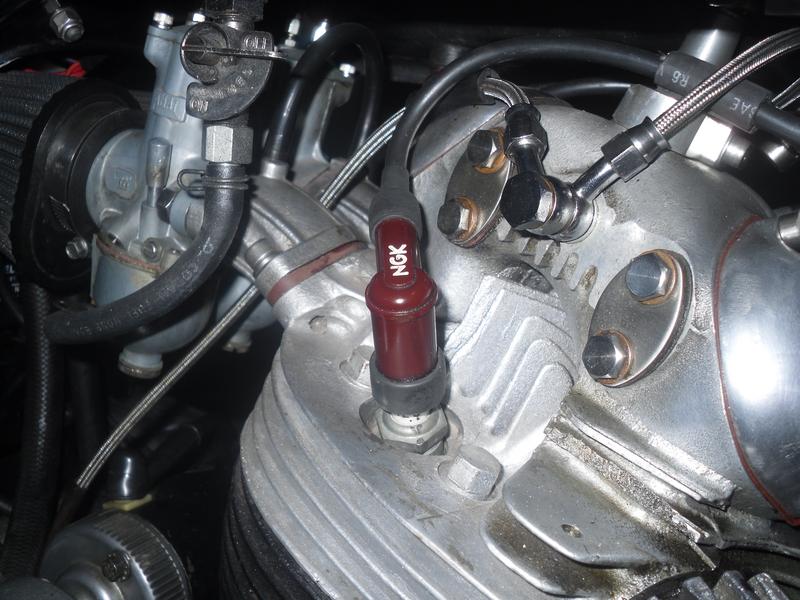
The Old Britts picture is a good example of how not to do it in my opinion, with the overlength crossover and banjos angled outward, especially with braided lines that could come into contact with, and abrade the underside of the fuel tank.

Personally, I like to keep the braided crossover as short as possible with all banjos angled inward and positioned so the nuts are not touching the head.
Head Removal
 
I have a braided hose for the rocker feed on my bike, routed as shown in the photo above. I did find some wear on the hose - the braid had rubbed through where it ran between the inlets. Hose replaced, and a short length of rubber oil pipe slid onto the braided hose to support it between the inlets. That stainless braid seems to be quite soft metal. Possible the hose was rubbing on the heads of the hex screws?

I notice some rubber hose in the photo, presumably placed to protect the inlet rocker cover?
 
I understood WEM was talking about the oil pipe coming from the timing cover to the first head banjo rather than the crossover side to side.
 
Last edited:
I notice some rubber hose in the photo, presumably placed to protect the inlet rocker cover?
Yes, also on the HT leads. Just fuel hose slit along the length and clipped over the braided line and HT.
 
Back
Top