1975 Commando 850 restoration

Have to admit I was in and out of mine so many times when I first bought it that zippers on the inner and outer cases would have been appreciated (though I went with RGM neoprene gaskets instead)
But... once sorted, and the black art of bending that spring mastered, all has been good since. 'Job worth doing' etc. etc......
 
The camplate bolt hexagon should be 3/16" Whitworth or 7/16" AF (both spanners fit mine) but if the camplate is rotated past either 1st or 4th gear position (I'm not sure which) then the quadrant should drop out of mesh with the camplate which can then be retimed to the quadrant as that's the only way the quadrant could have become mistimed to the camplate without loosening the bolt and pulling the camplate out of mesh.
So you are saying that I don’t have to take out the bolt to retime this correctly? If so, I’ll be back wrenching tomorrow to get it right.
 
Fitting the cam plate --


  • The shop manual says to place the cam in 4th gear with the knuckle end of the quadrant aligned to the top front cover stud. This is correct, but what are you actually doing and if you are off one tooth what is the consequences?
  • The quadrant sticks through the inner case and has a rectangular area that it is allowed to move in. If the quadrant is not located on the cam properly, say one tooth too low, you will be able to get neutral through 4th gears, but not 1st gear. As the following pictures will show, the quadrant is almost touching the top of its opening in the inner case when in 4th gear and almost touching the bottom in 1st gear. It is really disappointing to put the whole gearbox together and find you positioned the quadrant wrong.
  • I suggest you put the quadrant and cam together, then place the inner case in position and verify that you can get all four gears. With the gears missing you can see the cam indices, or notches, and plunger through the kickstart shaft hole in the inner case. I screw the index plunger in just enough that the plunger touches the cam, but not all the way. This lets you easily move the cam to verify you are getting all four gears. When I say get all four gears, I mean the plunger will fit into the gear notches in the cam.
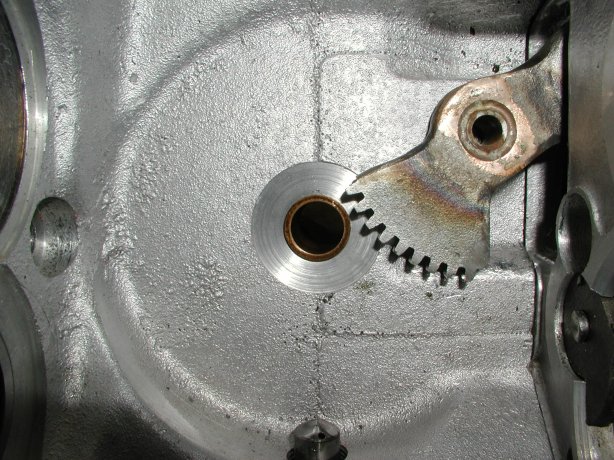
  • The following picture is of the cam plate and its five indices or notches (1st, neutral, 2nd 3rd and 4th). The cam is positioned in 4th gear by the plunger and notice the position of the quadrant.

    The cam plate
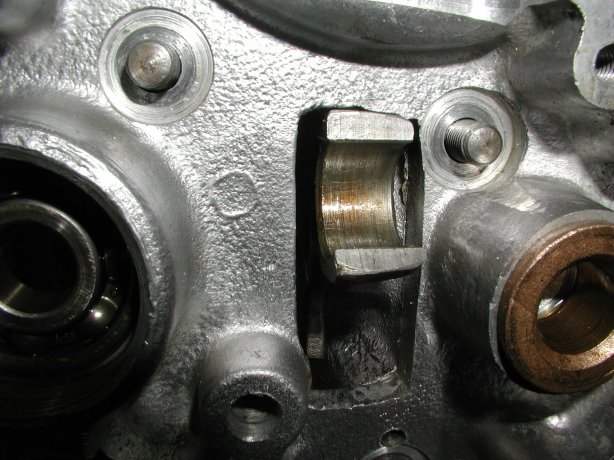
  • The following picture is of the quadrant without the cam. This shows how the quadrant is positioned when in 4th gear. You can see that the first tooth at the top of the quadrant will fit with the cam plate gear.

    The quadrant in its 4th gear position
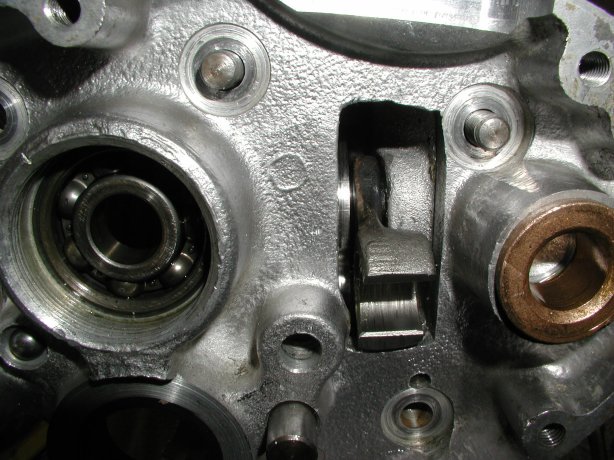
  • The following picture is the quadrant fitted to the cam and in 4th gear, seen with the inner case in place.

    The quadrant in 4th gear
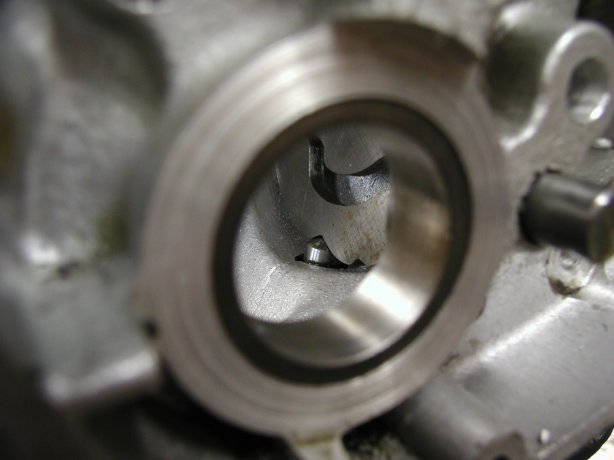
  • The following picture is taken looking through the kickstart hole in the inner case. In this case the cam is in 1st gear, the neutral notch is to the right of the first gear notch. You will be able to see the index plunger fit into each gear notch on the cam as you move the quadrant. This way you can verify that you are getting all four gears before you actually assemble the gearbox. If you can get all four gears in this step, but when you assemble the box and try to shift it with the shift lever and it does not shift and the ratchet spring is bent correctly, you have the quadrant one tooth too high. This mainly will occur with the MK3 gearboxes due to a larger window for the quadrant arm.

    Looking into the shell
  • The following picture is the quadrant fitted to the cam and in 1st gear, seen with the inner case in place.

    The quadrant in 1st gear
  • Fit the O-rings (04-0129) into both the quadrant and camplate shafts and secure with the bolt (04-0136) and washer (00-0174) for the camplate and the pre-MK3 quadrants. For the Mk3 quadrant, use the O-ring (04-0129), washer (06-5149) and circlip (01-9512).
  • The shaft of the camplate is supposed to stick out past the casting boss slightly, so that you can tighten up the bolt and the cam shaft will still rotate. I have found in some cases the camplate shaft is too short or the gearbox shell casting is too long and I can not tighten up the camplate. What I have had to do is take a thin 1/4" washer that the O.D. is less that the I.D. of the casting boss, File out the I.D. of the washer so it will fit over the bolt, and this will shim out the camplate shaft enough to be able to get it tight.
 
I believe so, although I don't know why 7/16" AF doesn't fit your camplate bolt.
1975 Commando 850 restoration
I’ll try the 7/16 again just to be sure but if I can’t remove it I’ll try to retime the way you referred to in your earlier post.
 
Success! I have successfully retimed my camplate and quadrant so that I can hit all gears with the inner cover installed. I rotated the camplate past 1st gear and as LAB has said the quadrant will unmesh with the camplate gear allowing you to rotate the camplate into the correct position. I’ll reassemble everything and hopefully on the road tomorrow afternoon.
 
Went to the auto parts store and purchased some paper gasket material and made my own gearbox inner cover gasket. It came out real good, very satisfactory. I reassembled the gearbox, clicked through ALL the gears then filled with gear oil. Finished assembling everything else and took it for a ride. Everything works great! The clutch is an easy pull with smooth gear changes up and down. The bike handles well and the brakes feel good too. The engine runs strong with a 1400 RPM idle. I only rode for about a half hour cause it is dark and the deer are thick around here. I counted five in that little bit of time. Tomorrow is supposed to be a beautiful day weather wise and I expect I’ll be riding with a great big smile on my face. Thanks to all that have helped me on this journey, I couldn’t have done it without you all. Be safe and happy riding!
 
All the sweeter now having faced adversity and come through the other side a wiser man right Larry ? It’s a Zen thing -LOL
Have fun & be safe .
 
Went to the auto parts store and purchased some paper gasket material and made my own gearbox inner cover gasket. It came out real good, very satisfactory. I reassembled the gearbox, clicked through ALL the gears then filled with gear oil. Finished assembling everything else and took it for a ride. Everything works great! The clutch is an easy pull with smooth gear changes up and down. The bike handles well and the brakes feel good too. The engine runs strong with a 1400 RPM idle. I only rode for about a half hour cause it is dark and the deer are thick around here. I counted five in that little bit of time. Tomorrow is supposed to be a beautiful day weather wise and I expect I’ll be riding with a great big smile on my face. Thanks to all that have helped me on this journey, I couldn’t have done it without you all. Be safe and happy riding!
You can bump the idle down to 1,000 RPM, no lower.
 
Logged about 125 miles of beautiful riding today. The bike ran great until it didn’t. I was about seven miles from home and the bike just died with no warning. No misfires or anything else. I was going down a rural road and pulled over not too far from a farmstead. I then called my wife and told her where I was located and she proceeded to tell me that the farmer that lived not too far away was a real nice old guy so off I walked. I knocked on the mans door and not knowing me from Adam he waved me in. Talk about hospitality! This old man was as nice as can be. I explained to him who I was and my predicament and asked if I could push my bike onto his property for safekeeping until I could get a truck and trailer to take it home. I got the go ahead so I beat feet to the bike and pushed it the 300ft or so back to my new friend’s farm. Nice guy, he let me store the bike in a nice clean and dry barn until I can pick it up tomorrow. Country living can’t beat it. When I get the bike home I’ll troubleshoot it and repair hopefully. The electrics seem fine, lights, starter etc. I have fuel in the tank and I can smell fuel when attempting to start but no fire. So far I have fuel and air so I guess I’m missing spark. I suspect something is wrong with my Power Arc EI but won’t know for sure until I troubleshoot. Thoughts? I will report back when new information is obtained. Thanks in advance.
 
Well it turned out to be a non issue. The problem was a loose fuse inline with the EI. It felt a little funky when I was removing it but it looked good when eyeballing it. Just to be sure I checked it with my multimeter. All good - reinstalled and pushed the starter button and she fired right up! Easy fixes always make me feel a little uneasy but like a former mentor always said, “Never overlook the obvious.” Recalling that I proceeded to go on what ending up being a 100 mile flawless test run. Feeling good!
 
It’s time to close this thread down. I’ve done 496 glorious miles on my bike since the rebuild with only minor issues that were quickly resolved. In my book that’s success. Thank you to everyone on this great forum who have helped me on my journey. Thank you Jerry for this goldmine of information - no doubt you’ve helped save hundreds of Commandos! Count this as one more. This past year and five months building this bike have been some of the best times in my life. I am very proud of how my bike turned out despite having never done this before. Any more issues with my bike will be dealt with in a new thread. Thank you everyone! Ride on!
 
It’s time to close this thread down. I’ve done 496 glorious miles on my bike since the rebuild with only minor issues that were quickly resolved. In my book that’s success. Thank you to everyone on this great forum who have helped me on my journey. Thank you Jerry for this goldmine of information - no doubt you’ve helped save hundreds of Commandos! Count this as one more. This past year and five months building this bike have been some of the best times in my life. I am very proud of how my bike turned out despite having never done this before. Any more issues with my bike will be dealt with in a new thread. Thank you everyone! Ride on!
Wait!
Offer up a couple of artsy photos of your completed project.
 
Wait!
Offer up a couple of artsy photos of your completed project.
Lol! Photos will be had after I clean and polish. I’ve been riding the hell out of this bike and it is dirty! Every time I start to clean it up I just think to myself I should be riding instead of polishing. The rag gets put down and the jacket, gloves and helmet get put on and away we go. It’s running like a dream and I can’t quit riding it! I’ll try to get it cleaned up sometime this coming week and get them posted.
 
Theres nothing wrong with dirty pictures Larry.
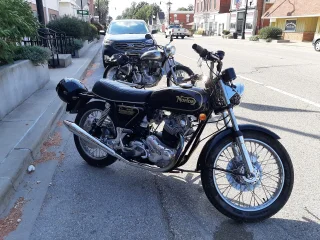
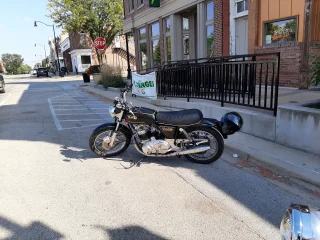
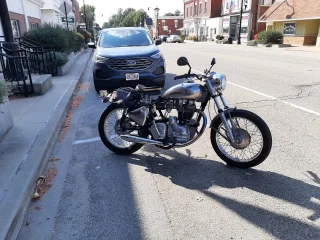
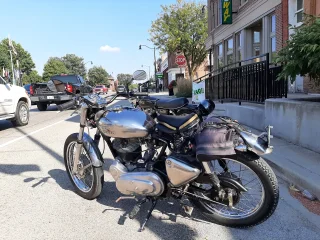
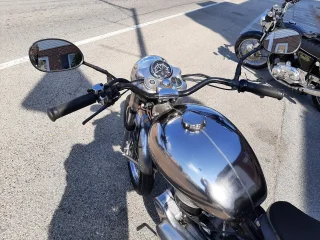
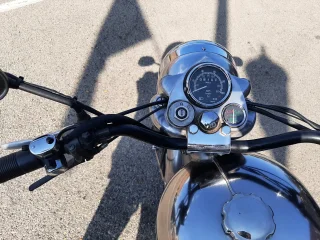
Ok, here's a few from today's ride. I only tooka couple pics of my bike because I was too busy taking pics of this Royal Enfield. Nice bike. I tried to find the owner but was unsuccessful. It's a small town that I live in so I'll track him down sooner or later.
 

Attachments

  • 1975 Commando 850 restoration
    20210917_155002.webp
    549.6 KB · Views: 316
  • 1975 Commando 850 restoration
    20210917_154937.webp
    503.6 KB · Views: 317
  • 1975 Commando 850 restoration
    20210917_155017.webp
    578.9 KB · Views: 314
  • 1975 Commando 850 restoration
    20210917_154929.webp
    490.2 KB · Views: 296
  • 1975 Commando 850 restoration
    20210917_155154.webp
    585 KB · Views: 290
  • 1975 Commando 850 restoration
    20210917_155200.webp
    406.8 KB · Views: 303
Back
Top