1969 Commando revitalization.

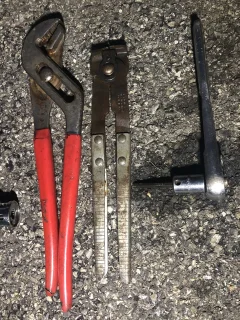
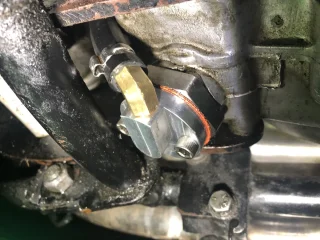
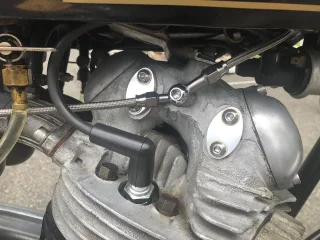
Got the vent in it’s easy even with the early frame with the extra crossover brace, only needed the theee tools in the pic.

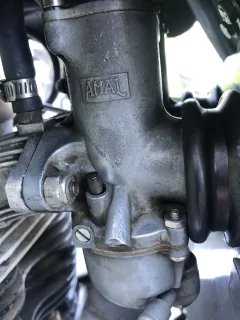
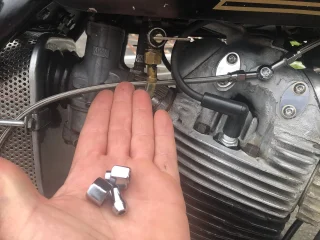
Finding the right plug for the old vent is challenging as I’m still looking.
 

Attachments

  • 1969 Commando revitalization.
    2E2C4F72-D0B6-49E7-A7C6-4070FF837400.jpeg
    209.9 KB · Views: 149
  • 1969 Commando revitalization.
    03852F0C-3D4F-4B9F-B0B4-98FFBFFFBB2D.jpeg
    695 KB · Views: 119
  • 1969 Commando revitalization.
    A117E2D4-B195-4698-905D-D52E0CBF44CE.jpeg
    325.2 KB · Views: 133
I went to a hydraulics shop for the timed breather plug I put in my 1970 - a -5 ORB (O-Ring Boss) plug fits perfectly. I popped for a stainless steel one.

Hope this helps.
 
newbie ? My timing cover gasket weeps almost leaks is it a simple pull caver and replace gasket or is there more to it?
 
My timing cover gasket weeps almost leaks is it a simple pull caver and replace gasket or is there more to it?

The auto-advance (AAU) or electronic ignition rotor has to be removed from the camshaft taper first (and the ignition then re-timed when it is replaced).
 
The auto-advance (AAU) or electronic ignition rotor has to be removed from the camshaft taper first (and the ignition then re-timed when it is replaced).
Ok thanks, it can wait till fall I want to ride this bike soon.
 
Will these levers and throttle fit a Norton Commando? I can't see any reason why it wouldn't, however the description leaves out the Norton Commando .

 
Minimal progress but still progress , new alluminum rocker shaft covers hoping for less leakage and better looks. Also put new steel braided oil lines for the same reason. I have new gas line fittings from the previous owner but they are the wrong size .
 

Attachments

  • 1969 Commando revitalization.
    CA9FAF5C-B118-4BC2-B16A-6AFED252565B.jpeg
    381.6 KB · Views: 129
  • 1969 Commando revitalization.
    4C0C4732-93E3-4F63-957D-EDE5402880F4.jpeg
    350.2 KB · Views: 122
Minimal progress but still progress , new alluminum rocker shaft covers hoping for less leakage and better looks. Also put new steel braided oil lines for the same reason. I have new gas line fittings from the previous owner but they are the wrong size .
[/QUOT

Beware any chafing by braided lines against paintwork, frame etc. Especially under the tank where: 'out of sight' can be: 'out of mind' too....
 
Yes good tip! As I passed the upper line through near the coils I couldn't help think that maybe these pretty braided lines might be over rated. Hope they work out if not I'll have a good looking bike to push home. :eek:
 
Yes good tip! As I passed the upper line through near the coils I couldn't help think that maybe these pretty braided lines might be over rated. Hope they work out if not I'll have a good looking bike to push home. :eek:
I cover them with clear heat shrink tubing. You can find it in cut to length rolls.
 
Yes good tip! As I passed the upper line through near the coils I couldn't help think that maybe these pretty braided lines might be over rated. Hope they work out if not I'll have a good looking bike to push home. :eek:

You can slit sections of 1/4"/6mm fuel or similar plastic pipe and clip them onto the braided line where necessary or use spiral wrap.

1969 Commando revitalization.


Also, the rocker feed wouldn't normally be routed between the airbox and bolt as it is in your previous picture below, and how you also have the braided line routed.
1969 Commando revitalization.


With the cross-over line kept as short as possible (they are often supplied far too long), the RH cross-over banjo on the inside next to the head and banjos angled inward then the lines should be clear of the Roadster fuel tank.

1969 Commando revitalization.


Originally, your '1969' model would have had the rigid rocker feed pipe, not the flexible plastic line.
1969 Commando revitalization.
 
Last edited:
LAB thanks I didn’t know I just followed what is on the bike but I will route the lines correct but stay with the steel braided .
 
No new work to report on but I did take the bike for a longer ride actually the longest ride so far started well I rode only few miles to destination and shut the bike off for 1/2 hour went to start it again and nothing grrrr , finally it fired :D and I rode back spit and sputter the whole way almost home it shut off kicked back to life and then home. Was a bad day I thought the bike was all dialed in confidence was high but now grrr I ready to go ride my Kawasaki.
 
Which actually leads me to this question if bike is up to running temp and then shut down for about a 1/2 hour does one need to tickle the carbs again? Thinking maybe I flooded it because I kicked first with no tickle after several no starts I tickle and several kicks it fired .
 
Which actually leads me to this question if bike is up to running temp and then shut down for about a 1/2 hour does one need to tickle the carbs again?

It can do especially if the bike is parked out in the breeze/wind. A 1- 2 second press of the ticklers can be enough if the engine isn't stone cold.

finally it fired :D and I rode back spit and sputter the whole way almost home it shut off kicked back to life and then home.

Once started and warmed up then it should've returned to normal running so maybe it fouled a plug?
 
Also...
I mentioned previously that one of your pictures shows the RH carb is what appears to be a non-standard 930/11 so could be worthwhile checking if it and the LH carb (whatever that is) have the correct jets, slides, needles, etc. if you haven't already done so.
 
Also...
I mentioned previously that one of your pictures shows the RH carb is what appears to be a non-standard 930/11 so could be worthwhile checking if it and the LH carb (whatever that is) have the correct jets, slides, needles, etc. if you haven't already done so.
Haven’t gotten into the carbs yet actually planning to buy two new ones when they are available.

The right carb takes longer to tickle than the left, don’t know what that means but I’m thinking the right carb was running out of gas yesterday’s ride was down hill and ran fine on the way back almost all up hill it sputtering got bad then the stall so maybe a float issue. Appreciate the carb info it’s all new to me and so different than Japanese bikes.
 
The right carb takes longer to tickle than the left, don’t know what that means but I’m thinking the right carb was running out of gas yesterday’s ride was down hill and ran fine on the way back almost all up hill it sputtering got bad then the stall so maybe a float issue.

It could be a low float/fuel level (or partially blocked banjo filter?).
Info in the links on how to adjust if you decide to check:

"CHECKING & SETTING FLOAT HEIGHT".

 
So what do the experienced Commando owners think.

My carbs apparently are not a match one is 930-11 the other no markings the non marked one has a stripped thread for the a bowl screw the 930-11 seems to run out of gas and there is unknown jets in the carbs, both slides seem to slide nicely, question is would you recommend rebuilding a mismatched pair or buy new? I have found new carbs available and will spend the cash but maybe there is something to work with on these carbs however the mismatch kinda bugs me.
 

Attachments

  • 1969 Commando revitalization.
    FA1FD8A2-9C7F-4FDB-8C22-0577EDDD4A86.jpeg
    319.5 KB · Views: 75
  • 1969 Commando revitalization.
    23FB5BFE-5CE0-42BD-9848-DB648E495873.jpeg
    300.8 KB · Views: 83
My carbs apparently are not a match one is 930-11 the other no markings

The LH carb would normally have a raised pad with markings on the RH side the same as the RH carb?
both slides seem to slide nicely, question is would you recommend rebuilding a mismatched pair or buy new?

The body castings are often the same for a range of specifications so it can be down to the amount of wear although the bodies (or slides) can be sleeved it may not be worth it.

the non marked one has a stripped thread for the a bowl screw

Can often be repaired by tapping the stripped thread to M5. (Original is '2BA', 0.1850"/4.7mm)
 
Last edited:
Back
Top