P11 gets the JSM treatment

Your bike looks brilliant but I have to say I don't like that silencer mount
Would you be adverse to adding another lug to the frame above the existing one and forming a triangular plate ?
That big ugly thing has always been a good joke. People really like to point at it and laugh at it. Same goes for the manual ball valve on the oil feed line. Of course they can't do that from behind following. It has to be standing still parked to enjoy the frivolity. :)

I'm not a welder, but a triangle mount off the frame would be a better engineered design. Originally all it had was a 1/8" x 3/4" wide straight strap at that location. That's how Bubb mounted it when he built it. The mount on the megaphone was a 1/8" thick x 3.5" long triangle shape with one mount point at the top of the triangle. It cracked along the entire edge of the triangle on the megaphone after about 1000 miles. I got it rewelded and tried a few different things. It has cracked several times over the years and I get it rewelded. Now it is bolted close to the base of the triangle with the top of the triangle cut off. There are 4 additional mount points bolted into inserts in the megaphone. Still shows thin hairline cracks once in a while I fill with epoxy when they show up. Red neck engineering.

Might give your idea a go someday.
 
I have a lot of respect for people who work on P11's. I just spent the entire morning changing a broken kickstand lug on one... Managed to do it without removing the primary, but what a job... I think I will just stick with wrenching on Commandos...

Hats off to you sir!!
 
I'm not sure I qualify for respect. A straight jacket and a padded room I qualify for though.

It is not a labor of love. It's an obsession.

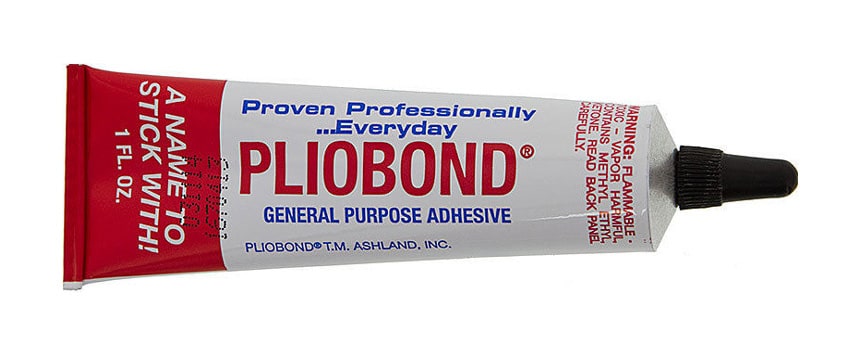
More Notes: Taking a Norton head off the barrels that has Pliobond adhesive on it requires more than a tap under the exhaust nut. I had to make a 6" custom punch out of hard wood and use a healthy dead blow hammer. Way more whack than I expected to use before I got it to pop free of the barrels. The copper gasket is still perfectly bonded to the barrels. So much so I'm tempted to strip the Pliobond off, re-apply a fresh coat of Pliobond and reuse it as is. Well, after I safety wire those darn screws. However, I did get a new gasket just in case I destroyed the gasket pulling up the head.

I was thinking it wasn't going to come up and starting to wonder just how well those lifter guide screws really would hold with nothing more than Blue Loctite on them. ;)
 
Which Pliobond product is used for the head gasket?
It seems that Pliobond has a number of adhesive types.

Glen
 
I used the stuff that JS sells on the 920 and so far it’s oil tight. I imagine you can buy it everywhere over there, but it’s not on sale here, so I’m grateful to Jim for stocking it.

I also used his thin copper wire trick, that was a bloody fiddly job, even on the bench, but I got there in the end. Am also using waisted stem fasteners.

 
Long babbling drivel:

Pliobond is not fun to work with unless you are a masochist. Hmm, I guess most Norton owners are by default. It doesn't mix well inside the tube. Sometimes it comes out in a rush like uncooked egg white, sometimes it has a little Biege colored viscosity to it. As mentioned, the copper wire is a real treat to work with. Tweezer fingers like Edward scissor hands has would make it easier to deal with.

Note about the wire. I kept the wire loop fairly close to the opening in the gasket. This was a mistake. Where I placed the wire cross-over ended up inside the tunnel and was not crushed. Thinking it would be easier, I applied the wire to the head gasket while it was on the cylinders or barrels. I can't remember which. It needs to be applied directly to the head around the tunnel as shown in the instructions that come with the JS kits. The copper wire does work when crushed properly. It ends up looking like it is part of the gasket. It looks like a lot of wire comes with the head gasket, but it is not a lot of wire once you start making the loops around the push rod tunnels.

I did not get a chance to test the setup for oil leaks yet. However, given how much effort it took to get the head off the stuff, I doubt it would leak. I've had the head on and off that motor 5 times since I bought it. I have never had to make a custom drift to get it off in the past using old school Aluminum paint. Just a light tap with a dead blow hammer loosened it up. I think for Pliobond or any surface sealer to work, the barrels and head have to be nice and flat though. Painfully obvious.

I used the cNw 750 bolt kit and a dab of ARP thread lube on the through bolts and nuts on the studs to get even torque. I did chase the threads in the barrels as well. All common sense to me. But I am the guy that forgot to safety wire the lifter guide screws, so take that will a grain of salt. The Carillo rods come with some nice thread lube that could also be used for the head bolts. Not a recommendation. That is just how I did it.

The cNw head bolt kit is for Commandos and will not work on a stock P11 head and barrels. Modifications need to be made to both the head and barrels for the larger bolt sizes used on Commandos. I did all that 30 years ago, so it made the install job easier. Tightening torque values are also higher for the larger bolts.
 
Is the Pliobond just used around the pushrod tunnels or are both surfaces fully coated everywhere?
My current leakage on the 920 is at the rear of the head, in between the carbs.

Glen
 
You have to cover both sides of gasket and the head and barrel surfaces. I wish it were just around the pushrod tunnels. That would be the stuff dreams are made of.

I just started removing the nuts on my barrels and noted that there is a blob of Pliobond sitting on top of one of the lifter blocks. Fortunately, the lifter block does not move with this setup, and the blob is not covering an oil passage, and the stuff is so sticky it isn't likely to move ever. I'll be able to clean it off when I get the barrels on the bench. Pliobond is basically like working with water until it firms up, which is relatively quick. Large doses of patience are required.

I'm not familiar enough with the larger bore motors and how they are clamped. Nigel would be the guy for that.
 
This one is a bit of an odd one as it uses an alloy cylinder that was made in the UK back in the 80s.
The designer made some changes to improve cylinder hold down plus the bolts by the spark plugs (2 each side) are metric. They are 10 mm which is .394", so a bit larger than the stock 3/8 bolts.
Right now those 10mm bolts are stainless Allen head. I could make some waisted SS bolts or I could go the other way and try high tensile.
I'm not sure if the bolts are stretching too much or not enough!

Glen
 
I found the JS head gasket video. It seems he is just using a bit of the Pliobond around the tunnels and bolt holes.

I would be inclined to do it the way you have, coat all of the surfaces. If a little is good, more has to be better, right :)

Glen
 
Glen why not put inserts in so you can use the off the shelf wasted fasteners from cNw or JSM? They are a known quantity, the working out has already been done !
 
Glen, dunno which video you watched but Jim advocates applying Pliobond on both sides of the gasket, around the bores as well as the tunnels and oil drain hole, plus the head and the barrel surfaces.

I followed his method and have been leak free so far (touch wood).

 
The joy never ends.

Now the barrels are stuck to the cases. Different goop used though (Versatchem Mega Black), but similar coat it all technique. I think I only coated the copper base gasket both sides in this instance.

I really don't like beating on parts to loosen them that much and don't want to snap any fins off the barrels. Damn delicate motorcycles. I gotta say I doubt I ever would have had an oil leak doing as JS suggests. I didn't use anything on the top of the base gasket last time. Barrels lifted right off, and I never had a leak. Paper gasket though.

Another 30-minute job that will take 3 hours to get done. If I'm lucky. This job might require some thin putty knife expertise.

Enough whining for today.
 
Glen, dunno which video you watched but Jim advocates applying Pliobond on both sides of the gasket, around the bores as well as the tunnels and oil drain hole, plus the head and the barrel surfaces.

I followed his method and have been leak free so far (touch wood).


That's the video, seems I gave it what my wife calls a " Man Look".
I missed the " around each bore" mention.
On the 5 thou wire at the tunnels and drain hole, does it get applied only to the head face or to the cylinder face as well ?

Glen
 
That's the video, seems I gave it what my wife calls a " Man Look".
I missed the " around each bore" mention.
On the 5 thou wire at the tunnels and drain hole, does it get applied only to the head face or to the cylinder face as well ?

Glen
I did the Pliobond dance around everything including the bolt holes. Could be why is was so hard to lift.

Jim is applying the wire to the head. I'm not sure there is enough wire to do both barrel and head surfaces. If there is enough wire it probably wouldn't hurt, but you may find you don't want to do both surfaces after you do one. Then again my finger tips are numbs on my left hand. Maybe that's why it wasn't much fun.
 
Yes, wire one side only I believe, I don’t think it matters much which side.

You don’t wanna do both sides. It’s a PITA as it is without making it a double PITA !!
 
Glen,

If you have never used one of Jim's copper head gaskets, maybe give one a try. He roughs up the gasket surfaces to improve adhesion or to get them to an exact thickness spec. Unless that is how copper gaskets sold today are prepared by everybody selling copper gaskets. I have been away from wrenching on my 750 for 30 years and things may have changed. Point is his copper gaskets hold adhesion better than any copper gasket I've used in the past.
 
Been a minute. A particularly long one for me. Damn fresh motor popped like a kettle corn machine at the fair when I started it up. Would die instantly if I didn't blip it at high RPM. I believe it was running on the accelerator pump fuel and little else. But I did not want to believe that... So I thought I had a short. Ran through that troubleshooting list, nope. Then I thought blown head gasket. Come on man, not yet. Compression test on the new bore and rings was kind of low, but shouldn't keep it from starting and running. Then cam timing being wrong came to mind. Took the timing cover off twice and checked it twice. 10 rollers between dots with engine at TDC. Not that. Next back to bad gas, carbs screwed up? Still a maybe on that. I did not disassemble them. What finally got it sort of working was advancing the ignition timing at the TriSpark stator plate and keeping it running no matter how bad it sounded. It was either a few degrees off, which shouldn't matter much. It was setup with a degree wheel, but the stator and rotor do not have the marks in the right place for a P11, so I kind of drew them where I thought they should go. Or, the carburetors started working better after blipping the heck out of them not worrying if the motor came flying apart. It probably is a combination of bad gas and the carburetion being so dried out and crusty it was not flowing well initially. They were on the bench for a month all ends open. It started running OK, but it was getting darn warm and smoke was coming off the head. Burning the residual oil from the oil lines dribbling on it until I got the banjos tight enough.

When it started running fairly well, it was on the lean side and probably too much advance. I'll continue to fart around with it.

No clue on the crank balance being alright yet. I did not let it idle once it started running closer to right. I'd have to ride it to feel the balance and that isn't going to happen until I get it dialed in and have a better clue about what the real problem was. Kind of scary after putting the time and money into it.

The engine is definitely quieter internally than it was with the 2S cam. Spins up no load about the same. Does sound nice. The road will tell the story for me. If it feels solid I might put it on a dyno. Get me some of them 50HP bragging rights. ;)
 
Was beginning to wonder…!

Shame it’s not better news.

Can’t recall if you have filters in the lines or not? The FCRs are super sensitive to dirt / dust / of the tiniest size ! A risk further potentially exacerbated by being left open and dry.

Another potential issue to be wary of is the float needle housing sealing o rings perishing. If this happens fuel by-passes the float valve and can end up flooding the heck out of the engine. Enough to cause poor running for sure but also petrol wash, so definitely a point worth bearing in mind.

And, I recall you noting your concern that you may possibly have bent a valve on installation. Could this be the issue?

BUT before getting carried away… I wouldn’t do or worry about anything until I’d tried brand new plugs…

It just sounded like hell. The motor is probably fine. Although it was probably like putting 2 years on the engine in 15 minutes.

The spitting and misfiring was most likely from leaving the carburetors out so long. I should have known better and plugged the inlets. Didn't think I'd be working on it as long.

Fuel filters on top of the fuel petcocks in the tank only. I drain the bowls once in a while. 4 times after the rebuild. Never have found anything in the fuel. I might add one some day. If and only if I can make it fit where I want it.

It wasn't the float needle valve rubber seals, but I know they can be a problem.

Didn't bend a valve, but that was also on my "was it this or that" list.

The TriSpark Test mode can be used to determine if the plugs and ignition system are a problem. Kind of handy. The plugs are OK, but I will probably install some new ones.

It was running well when I shut it down. I'm not that concerned, just honest about went happened. I could have said it fired up first kick, which it actually did, and ran perfect after a couple of adjustments. All I would have had to do was skip the part in the middle where there was no fuel but accelerator pump fuel. ;)

Today I'll run it and slowly dial the ignition back toward where I marked the rotor and stator for 29 degrees. A degree wheel was used to determine timing although the setup is nothing like a Commando, so it was all hand scribed and may not be that accurate only close.
 
Back
Top