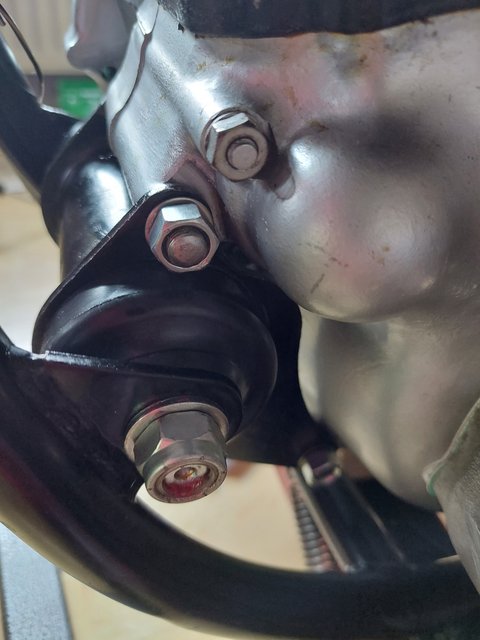
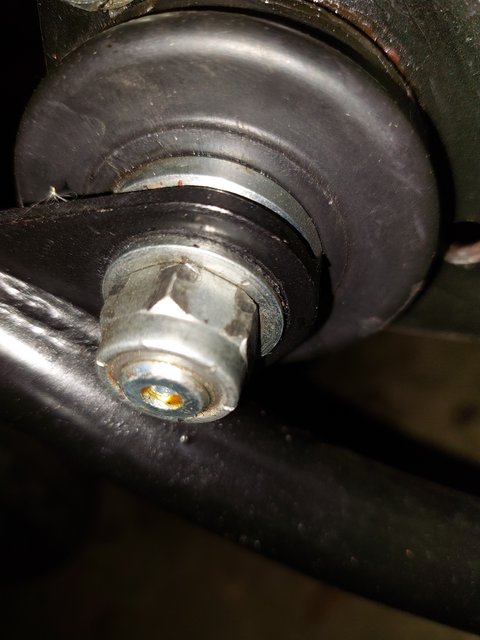
Did the front Isolastic conversion today.

I saw somewhere that CNW doesn't fit the rubber gaiters on their isos, do they use something else, or is it OK to just take off the rubbers and bin them?
Two schools of thought:

1. the rubbers keep out the grime and water keeping the grease clean
2. the rubbers trap in the grime and water turning the grease into an emulsion grinding paste

I run mine without. I use PTFE dry film lubricant to clean and lubricate the iso rubbing points. It sprays on like WD40 and thus it cleans, but it drys to a ‘dry film’ lubricant so it’s not gonna attract grit and turn into grinding paste.

No idea if this is the ‘best’ solution, it’s jus’ wot I do.
 
Bonzo, please give us a report on the new front isolastic rubbers in terms of vibration. Some folks have commented that the rubber in the "newer" adustable isolastics seems to be harder and transmits more vibration to the bike and rider.
 
I didn't need the flapper wheel I bought along with the 9/16 spanner as a bit of a rub with wire wool was all that was needed for this..

View attachment 98154

I opened the AN front Iso. kit and got ready for the install..

View attachment 98155

I don't own a vice yet (I do have a 9/16th spanner though ;)), so feared a struggle fitting the new rubbers, but simply holding the mounting in between my legs and with both the rubbers and the mount prepped in red rubber grease, the lot pretty much slid in (much like Mike's video). I packed it with red rubber grease..

View attachment 98156

..and installed the end caps, PTFE washers etc..

View attachment 98157

Fitting the unit back to the bike was fairly painless, with a bit of soft mallet use and a couple of engine height adjustments..

View attachment 98158

Thanks again to Mike's video, I knew the most easily accessible location to begin the vernier adjustments (at the rear, under the timing cover). I finished with .006. That may be too harsh, or just right, we'll see when we get on the road, I'll know where and how to make adjustments if needed.

Only one issue I had, was the timing side rubber gaiter, got snagged on the way into the frame, between the mountings, like a partial eclipse of where I wanted to slot the Iso. centre stud. I couldn't shift the bugger as it was trapped good & proper, so rather than knacker it, I removed the upper & lower studs again and tapped the unit down & out and was able to release the side of the gaitor. It all went back sweetly. A car scissor jack helped lining up the Iso. to the mount.

If it hadn't have been for the trapped gaitor and the annoying tool shopping trip, I reckon it would've taken 2-21/2 hours and if I can do it, anyone can. The rear? Hmmm. Maybe another time :eek:

Cheers..

View attachment 98159
Cheers Bonz !!

Not sure when you took the photo of the iso's, but I notice the centre stud is not far enough through to reach the Nyloc ring. Maybe it's over one side too far? (or you were taking a Guinness brake during the tightening)
 
Howdy Cliff,

You're talking about this one?

Did the front Isolastic conversion today.

I'll go and check in a bit as I honestly can't remember. Thanks for the heads up mate 👍
 
Cheers Bonz !!

Not sure when you took the photo of the iso's, but I notice the centre stud is not far enough through to reach the Nyloc ring. Maybe it's over one side too far? (or you were taking a Guinness brake during the tightening)
Yeah, we're good Cliff.

Did the front Isolastic conversion today.

I must've took the photo before adjusting & torqueing.

Thanks for keeping your eye on me. I'd hate you to suffer any mechanicals on your ride in August ;)
 
Howdy Cliff,

You're talking about this one?

Did the front Isolastic conversion today.

I'll go and check in a bit as I honestly can't remember. Thanks for the heads up mate 👍
Yep, that was the one, but I see you sorted it 👍

Flights all booked for August - can’t wait 😛
 
That will be with stainless components rather than the standard zinc.
RGM did do stainless adjusters, but are struggling to get them now, so are selling the zinc plated original ones. I think I'll park this upgrade until the shiny parts are available again
 
Back
Top