Building an Ohlins Shock

Status
Not open for further replies.
Dan, Is there a spring sleeve that Ohlins offers to accomplish what i see with this pictured Nitron build?
Moving the larger diameter spring up the cylinder to clear the bottom install.
I am not sure I like the debri/roadgrime cup this sleeve provides nor the potential to not allow the bump rubber to function properly, but it does allow Norton bottom install.


View attachment 17903
I have checked the operation of the Nitron without a spring and, although there in minimal clearance, the spacer does pass over the shock body - so, yes, the rubber bump stop is functional
 
I'll certainly volunteer.

Probably not as close as you like...

What price on the SD? Mounts with 6M?
The Silver will be $459.00
The Black will be $469.00

What is "6M"

The frame clamp is held together with two 6mm Stainless Steel bolts. This is an Ohlins part, that performs the same function on another model. It comes bored to 25 mm ID, I bored it to 1 inch plus a little for the thickness of the paint on the 1 inch frame tubing.
All other bolts are 8mm Stainless Steel Button Head bolts. With a thin wave washer under the head of the clamp bolt to protect the clamp surface.

I will post some pictures of the black damper
 
Dan, Is there a spring sleeve that Ohlins offers to accomplish what i see with this pictured Nitron build?
Moving the larger diameter spring up the cylinder to clear the bottom install.
I am not sure I like the debri/roadgrime cup this sleeve provides nor the potential to not allow the bump rubber to function properly, but it does allow Norton bottom install.


View attachment 17903
Nope. Not that I have seen. Nice drawing.
 
The Silver will be $459.00
The Black will be $469.00

What is "6M"

The frame clamp is held together with two 6mm Stainless Steel bolts. This is an Ohlins part, that performs the same function on another model. It comes bored to 25 mm ID, I bored it to 1 inch plus a little for the thickness of the paint on the 1 inch frame tubing.
All other bolts are 8mm Stainless Steel Button Head bolts. With a thin wave washer under the head of the clamp bolt to protect the clamp surface.

I will post some pictures of the black damper
Thanks. I meant to type M6 which is 6mm.
 
Building an Ohlins Shock
 
Thanks for the spring info.
If you would like some help setting up your 961, let me know I think, I can suggest some things to try. And loan you the parts as well.
If nothing else provide the Ohlins spec sheets.
I came across your
Norton vs Ducati at Willow Springs 1987 Thread
I was there that day as well, and was at all the Willow springs races in 1987. Small world.

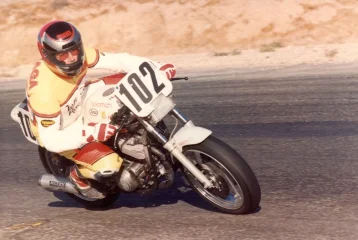
It is indeed a small world. Those were good times. This is admittedly off topic for this thread, but at risk of being accused of hi-jacking it, I can't resist posting this picture of me at Willow in 1987. Sorry there's no Norton content, but it is the only picture I could find of me at Willow from that year. Hey, at least the bike had Ohlins rear shocks:rolleyes:.
 

Attachments

  • Building an Ohlins Shock
    Ken SRX 4 1200.webp
    156.8 KB · Views: 252
The Silver will be $459.00
The Black will be $469.00

What is "6M"

The frame clamp is held together with two 6mm Stainless Steel bolts. This is an Ohlins part, that performs the same function on another model. It comes bored to 25 mm ID, I bored it to 1 inch plus a little for the thickness of the paint on the 1 inch frame tubing.
All other bolts are 8mm Stainless Steel Button Head bolts. With a thin wave washer under the head of the clamp bolt to protect the clamp surface.

I will post some pictures of the black damper
Dan
Could you please post the dimensions of that unit? Please include body length and diameter(s), rod length and stroke.
I want to set up a mock unit to see if it will work on my bike with the cNw brake lines.
Also - do you sell the frame clamp?
Cheers
Rob
 
Last edited:
Not yet on the clamps as I do not have enough of them yet.
Here is a drawing on the damper
Building an Ohlins Shock
 
Last edited by a moderator:
I would request a revised frame mount for this SD unit to allow a more mid section clamp of the SD cylinder.

1" handlebar mounts might be considered as they are readily available and would seem compatible with the 1" frame tubes.

SD008Blackline.jpg
 
Last edited:
I would request a revised frame mount for this SD unit to allow a more mid section clamp of the SD cylinder.

1" handlebar mounts might be considered as they are readily available and would seem compatible with the 1" frame tubes.

View attachment 17910
Is that for cosmetic reasons?
It does not matter to the damper were the clamp is.
 
For an Öhlins install, it appears to me to indicate "the easiest solution with what was at hand" .
I understand this and the bracket does indeed get the job done and may perform well.

My opinion, the damper would perform better, long term, with a more centralized cylinder clamp.
A few of these Öhlins SD damper types have a fixed central mount.

Maybe a transverse damper mount might allow a good Norton solution, but would require different brackets.
I dont have an SD008/SD001 to prototype brackets. I am hoping you will develop so I can simply purchase my Norton Mk3 damper from you.
Thanks for the thread
The Kawasaki ZX6 and ZX10 do have a fixed mounting point, these were designed as an OEM damper to be sold at the lowest possible cost, the clamps add $75 or more to the cost of a damper.
Only the aftermarket kit for the ZX6/ZX10 use that fixed point, as Ohlins had already made them, why not use them.
If Ohlins believed as you do that a fixed centralize mounting point was needed, that would be what they used on all their dedicated kits, and they would not have made them adjustable, or they would at the very least on the universal kit specified to use them within a certain range, they do not specify a range.
As to the design, what I wanted was a clean looking clamp, the Ohlins design is the best I have seen.
As far as the life span, as long as the damper is not banging against anything, AND it does not bind as it moves thru the stroke, where the clamp is will not have any effect.

My thoughts on the design began with making it user accessible , maybe that comes from building racebikes.
What I mean is while riding the bike, you should be able to reach the adjustment knob, with your left hand and adjust the damper.
Now maybe you really do not need to do that on the street, but that is what I was thinking.

This means the knob has to be on top, not below the shaft.
The access has to be with your left hand as your right hand is always needed to be using the brake or throttle all the time.
There is no easy way, that I could see to mount the damper traverse across the top of the triple clamp.
It could be mounted transversely under the bottom clamp, but access while riding would be very difficult, ask any Suzuki GSXR600/750/1000 rider with and Ohlins kit, as that is where it is mounted on those bikes as that is the OEM location.

For those that would like the damper mounted in the middle, it would not be that hard to do.
In fact I have an idea.
Put me on the clock.
 
Status
Not open for further replies.
Back
Top