Another recommissioning project for me

Never knew that. I had no pictures to work from and ‘assumed’ the correct way was how I’d done it. A bit of a PITA to correct both bikes :(

ho hum yet more to do. You know I can’t leave them be as they’ll be always on my mind.
Have you turned them the correct way yet ?
 
Just to calm your worries, I can confirm I have now removed and replaced the offending shaped washers in accordance with the previously supplied piccy from LAB.

Since then I have also refitted the mudguard, caliper and front wheel. Then bled the brakes along with fitting new pads and pins. It feels like a nice brake.
 
A picture helps.
Another recommissioning project for me
 
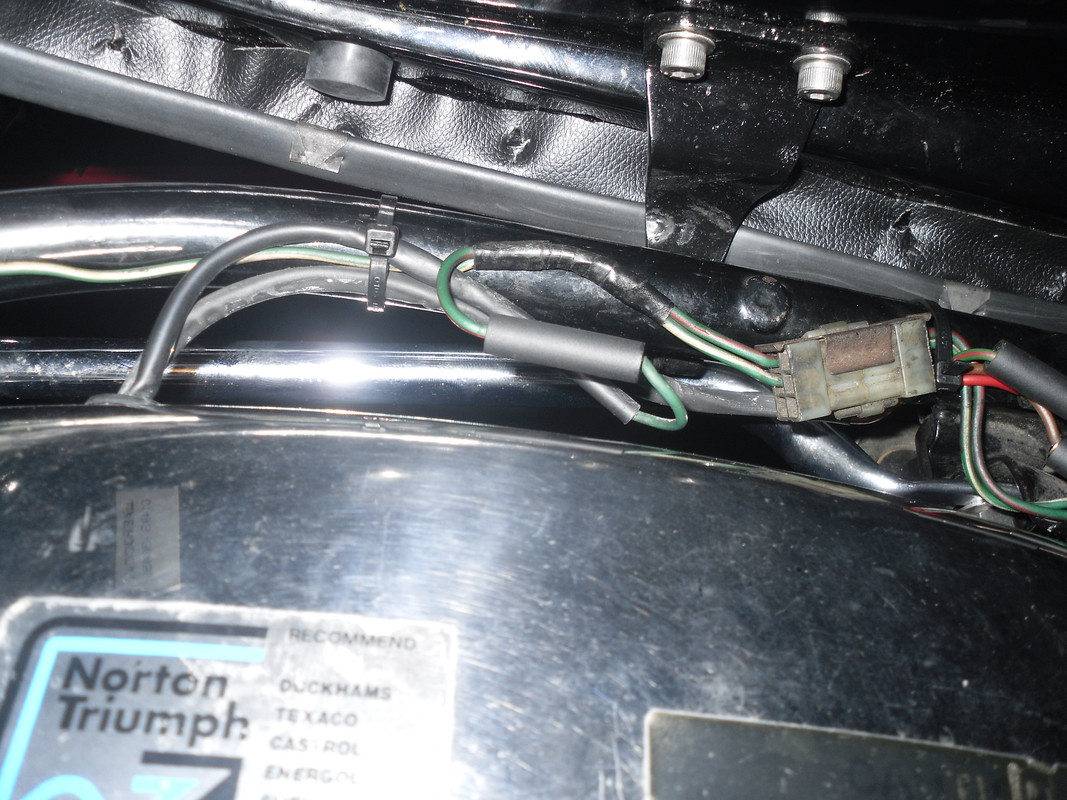
Starting at the other end now. I need to take great care as it has the original weird multiplug for the rear lights and I won’t want to disturb it.
3584F2AB-D23C-49D2-BCF3-29EFBE67D774.jpeg
C40468B7-2E99-4083-A3C0-9B6DC51118E7.jpeg
B15B0AA1-B14E-46C8-A46F-161FD77E7BF0.jpeg
Another recommissioning project for me
 
Last edited:
I'm wondering just how tight you'd have to tighten the fork bottom clamp bolts to crack those clamps? I've seen them broken before and like you say it's pretty common?
Very common and doesn't take much. The good news is they still work when broken. I always replace them with billet aluminum - that cast ones always break.
 
disconnecting ain’t the same as cutting 🤣

It is very useful to know that he does these fittings if I need to repair anything.

For the moment I’ve removed the rear mudguard and the chrome bar as a unit to clean it up on the bench. If the LH flasher lamp is in good condition then I don’t have a worry. The RH one is damaged but fortunately that one was a conventional bullet connector. I’m confident we have several original lamps stashed away to choose from, it’s good that they can be unbolted to components to mix and match as necessary.

I really, really, really need to get hold of a complete battery side panel if anyone has one going spare. I see they are available new steel or fibreglass, but the plinth that the badge sticks to isn’t available to my best knowledge.
 
For the moment I’ve removed the rear mudguard and the chrome bar as a unit to clean it up on the bench. If the LH flasher lamp is in good condition then I don’t have a worry. The RH one is damaged but fortunately that one was a conventional bullet connector.

I would expect both indicators to have a green wire with a bullet connector like mine has, not the LH directly connected to the plug (which ought to be green/red?) or there would be no way to remove the LH assembly without cutting the wire (or extracting the pin from the plug). Both rear indicator assemblies are the same (60-4105).
Another recommissioning project for me

T160 rear sub-harness (60-4178 without the original plug).
Old stock with plug.
 
Last edited:
I've just been out to see my T160 and that one has an original soldered bullet connector on both left and right indicators. Strange how this one appears stock. I’ll have to go and look at another of his T160s sometime to see how they are, and I know of someone else with a few to look at.

im going to get there will be issues with the starter solenoid and other lecky bits when I get into them
Another recommissioning project for me
 
im going to get there will be issues with the starter solenoid and other lecky bits when I get into them

Will the owner be keeping the points ignition (as it still has the ballast resistor and condenser pack)?

As a matter of interest, what or where is the other end of the heavy-gauge battery positive wire connected to because the factory changed its location at least once if not twice?
 
Last edited:
Firstly, looking at the parts book illustration it shows the 2 indicator wires coming out of the block, suggesting bullets on the end? Not that it’s mission critical and the owner has said ‘just cut the darn thing and use bullets’ but I would like to keep it as it was (but that may change if I get annoyed ;))

the +ve earth cable on this one bolts beneath the oil tank on the RH side of the motor. Mine has it bolted below the battery box on the LH side of the motor

we haven’t discussed ignition yet, that can wait until I get to a point of wanting to make it run. Then I’ll be asking the question that shouldn’t be asked - what shall I fit? That’s reminiscent of asking what oil or what tyres etc. The ignition coils are 17M6 - 6v?

On the subject of tyres, this one has its original TT100 tyres, are they made as replicas these days?
 
the +ve earth cable on this one bolts beneath the oil tank on the RH side of the motor.

That's where it is on my T160 but I doubt it's original.

Mine has it bolted below the battery box on the LH side of the motor


That, I believe is the correct later position and what's described in the T160 manual.
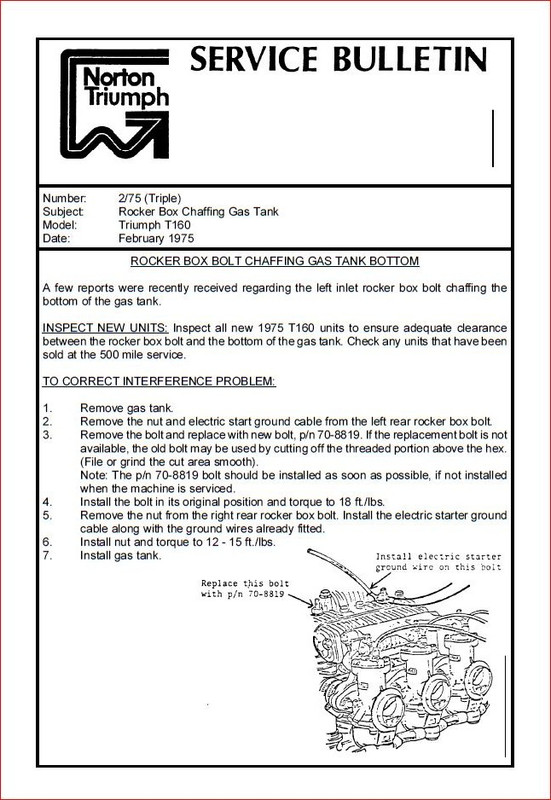
Earlier it went to a (LH, then RH) cylinder head fastener (click twice for larger images):
Another recommissioning project for me

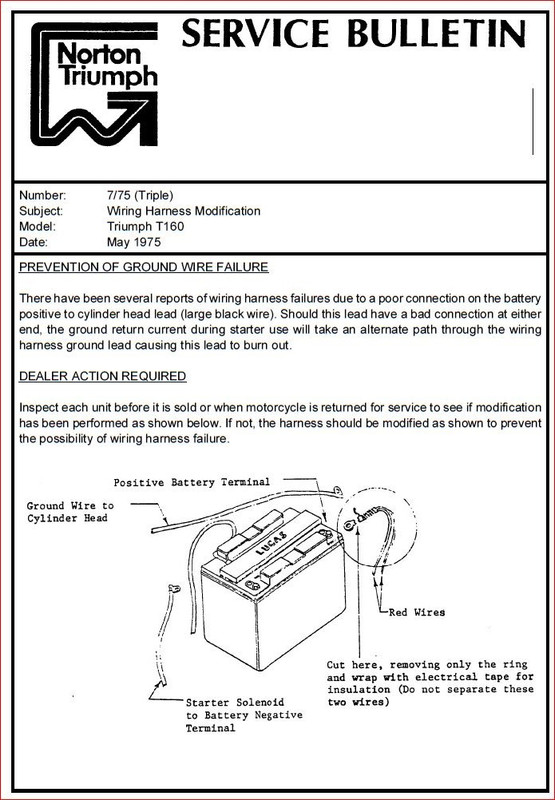
Whilst on the subject of electrics...

Important Service Bulletin regarding disconnection of the harness positive wire from the battery positive terminal and applies to all T160s: Another recommissioning project for me

The ignition coils are 17M6 - 6v?

Yes.
On the subject of tyres, this one has its original TT100 tyres, are they made as replicas these days?

TT100s are still available and look much the same but of course, they're no longer made or marked "Made in the United Kingdom".
 
Reading through the bulletin shows I need to remove the +ve twin red wires from the battery and cut off the securing ring. It was still wired to the battery, which incidentally was a solid state lead/acid unit - the acid had dried up, I don’t think it can be rejuvenated 🤣 I think I did this to mine last year, I don’t remember, but I’ll need to double check I have done so - things got a bit hectic last year while I was working on it ☹️
 
I'm wondering just how tight you'd have to tighten the fork bottom clamp bolts to crack those clamps? I've seen them broken before and like you say it's pretty common?
Not real tight. Four 5/16 nuts like that will exert quite a bit of force, relative to that skinny aluminium casting. I have seen a fair few cracked ones too so seems pretty common.
 
There is quite a gap between the leg and clamp when they’re snugged tight, perhaps some people expect the gap to close up further and ‘crack’ oops!
 
There is quite a gap between the leg and clamp when they’re snugged tight, perhaps some people expect the gap to close up further and ‘crack’ oops!
I'm guessing it's like when people strip the thread on sump plugs
They do it extra tight so it won't fall out and lose oil
And extra tight so the wheel dosent fall out! Oh well
 
I’m getting a bit more done, but waiting for some bits and pieces to progress things further. I have stripped and ultrasonically cleaned the carbs, then rebuilt them with new gaskets and seals. Cleaned up the gantry and then refitted the unit with air filter along with new intake rubbers.
Another recommissioning project for me
 
Back
Top