Crank grind, what am i missing?

Status
Not open for further replies.
Joined
Mar 23, 2019
Messages
16
Country flag
For my engine rebuild I'm about ready to take my scored crank to be reground. The wisdom seems to be that the crank should be dismantled and then assembled sans rotor since the rotor gets in the way of access to the journal faces.

I've looked at several 850 cranks and all have about a tenth of an inch clearance between the outer face e of the rotor and the inner face of the journal. So with a large enough grinding wheel there is a clear shot. Is this the problem...that the grinding wheels are too small?

The reason for poking on this is that I can't just bolt the halfs together since the crank bolts are too long and they protrude over the journal faces. Padding between the two halves with a bunch of washers makes me a bit nervous about just how aligned the assembly would be.

Maybe there are some mega accurate spacers that people use?

Source some shorter, regular grade 5 bolts to bolt it up for the grinder.
They don't have to be anything special as they are there simply to hold the crank cheeks together for the grind.
When done, throw the bolts in the bin with all the other bits never to be used again.
Note, before disassembly, mark which side of flywheel goes to which crank cheek. IE, drive side, or timing side, or both.
 
I sent the halves, separated to the grinder. The machinist is responsible for the setup.
If YOU bolt it together, you introduce some ambiguity into the job.
A lifetime in the metal trades taught me these running rules.
 
Make sure you crack test it before grinding. The sharp right angle at the section between the driveside main bearing and prk chop was cracked on my 850. There are good threads here on how to radius the section change.

 
Make sure you crack test it before grinding. The sharp right angle at the section between the driveside main bearing and prk chop was cracked on my 850. There are good threads here on how to radius the section change.

 
I had mine magnetic and eddy current tested. Done by the same engineering shop that did the grinding. They are a specialist engineering shop in Levin NZ.

Cracks at that point are very common. Over the years an engineering friend has seen more than 10. Plus a few that actually broke.
 
Last edited:
I called Mile High and they said just send us the 2 cheeks.

Their work left marks on both pins from what I think was a 3 jaw chuck. I may have caught them short handed, Covid was peaking. I just won't use them again.

Best
 
I called Mile High and they said just send us the 2 cheeks.

Their work left marks on both pins from what I think was a 3 jaw chuck. I may have caught them short handed, Covid was peaking. I just won't use them again.

Best
The job Mile High did for me was great. Diameter within .0001" of requested, up on the surface plate to verify, offset (stroke) and perpendicularity was indicated & confirmed.
If there were any cosmetic blemishes, I don't remember them.

JMWO
 
The job Mile High did for me was great. Diameter within .0001" of requested, up on the surface plate to verify, offset (stroke) and perpendicularity was indicated & confirmed.
If there were any cosmetic blemishes, I don't remember them.
They were referred to me by individuals that I trust, the 3 jaw marks weren't cosmetic, I could feel them with a finger nail. I was able to remove the ridges with 1500 then 2000 and finally polish the pins with crocus cloth. There was enough untouched drive side pin for the seal to do its job.
 
I used to have my cranks ground by a AER Crank Grind in North Melbourne, Victoria. If you wanted to find the guys, you always had to look for them in the pub next door. They always did a perfect job.
 
I used to have my cranks ground by a AER Crank Grind in North Melbourne, Victoria. If you wanted to find the guys, you always had to look for them in the pub next door. They always did a perfect job.

There are several crank grinders locally, but this was during the media blitz of covid. The shops that were open were short of staff and were about 12 months for turn around.

I started looking for a new crank, but didn't want to layout 2 grand for a forged one piece version.

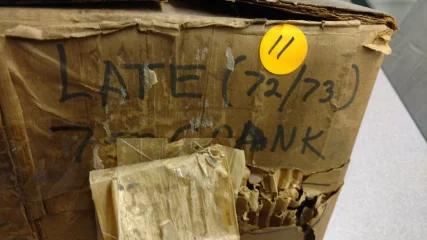
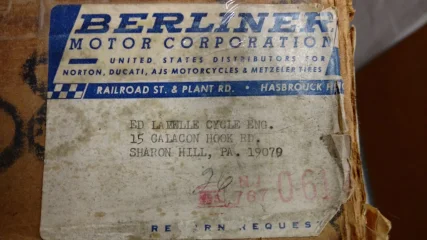
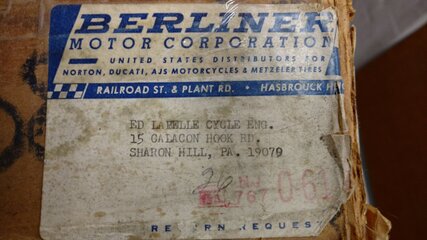
After several hours of web searching I found one in New Orleans still in the Berliner box. I got it for a tad over 400 USD, which included shipping. Less than most of the ebay boat anchors.

I was a very happy camper. How many NOS cranks are out there?
 
Crank grind, what am i missing?Crank grind, what am i missing?

I used the boolean search method to find these. The guy I bought them from got them from got them from the estate sale when Ed died.

Best.
 

Attachments

  • Crank grind, what am i missing?
    Crank box address.jpg
    242.6 KB · Views: 86
Status
Not open for further replies.
Back
Top